You can now draft and publish help articles for your products using Hellonext’s powerful Knowledge Base module 💙. You can share helpful articles links to your customers acting as a step by step guide to accessing the features on your product! It is designed to make your users find solutions, with ease, to their problems. 📝💻
You can use this module to frame,
Frequently asked questions
How-to guides
Troubleshooting instructions and so on.
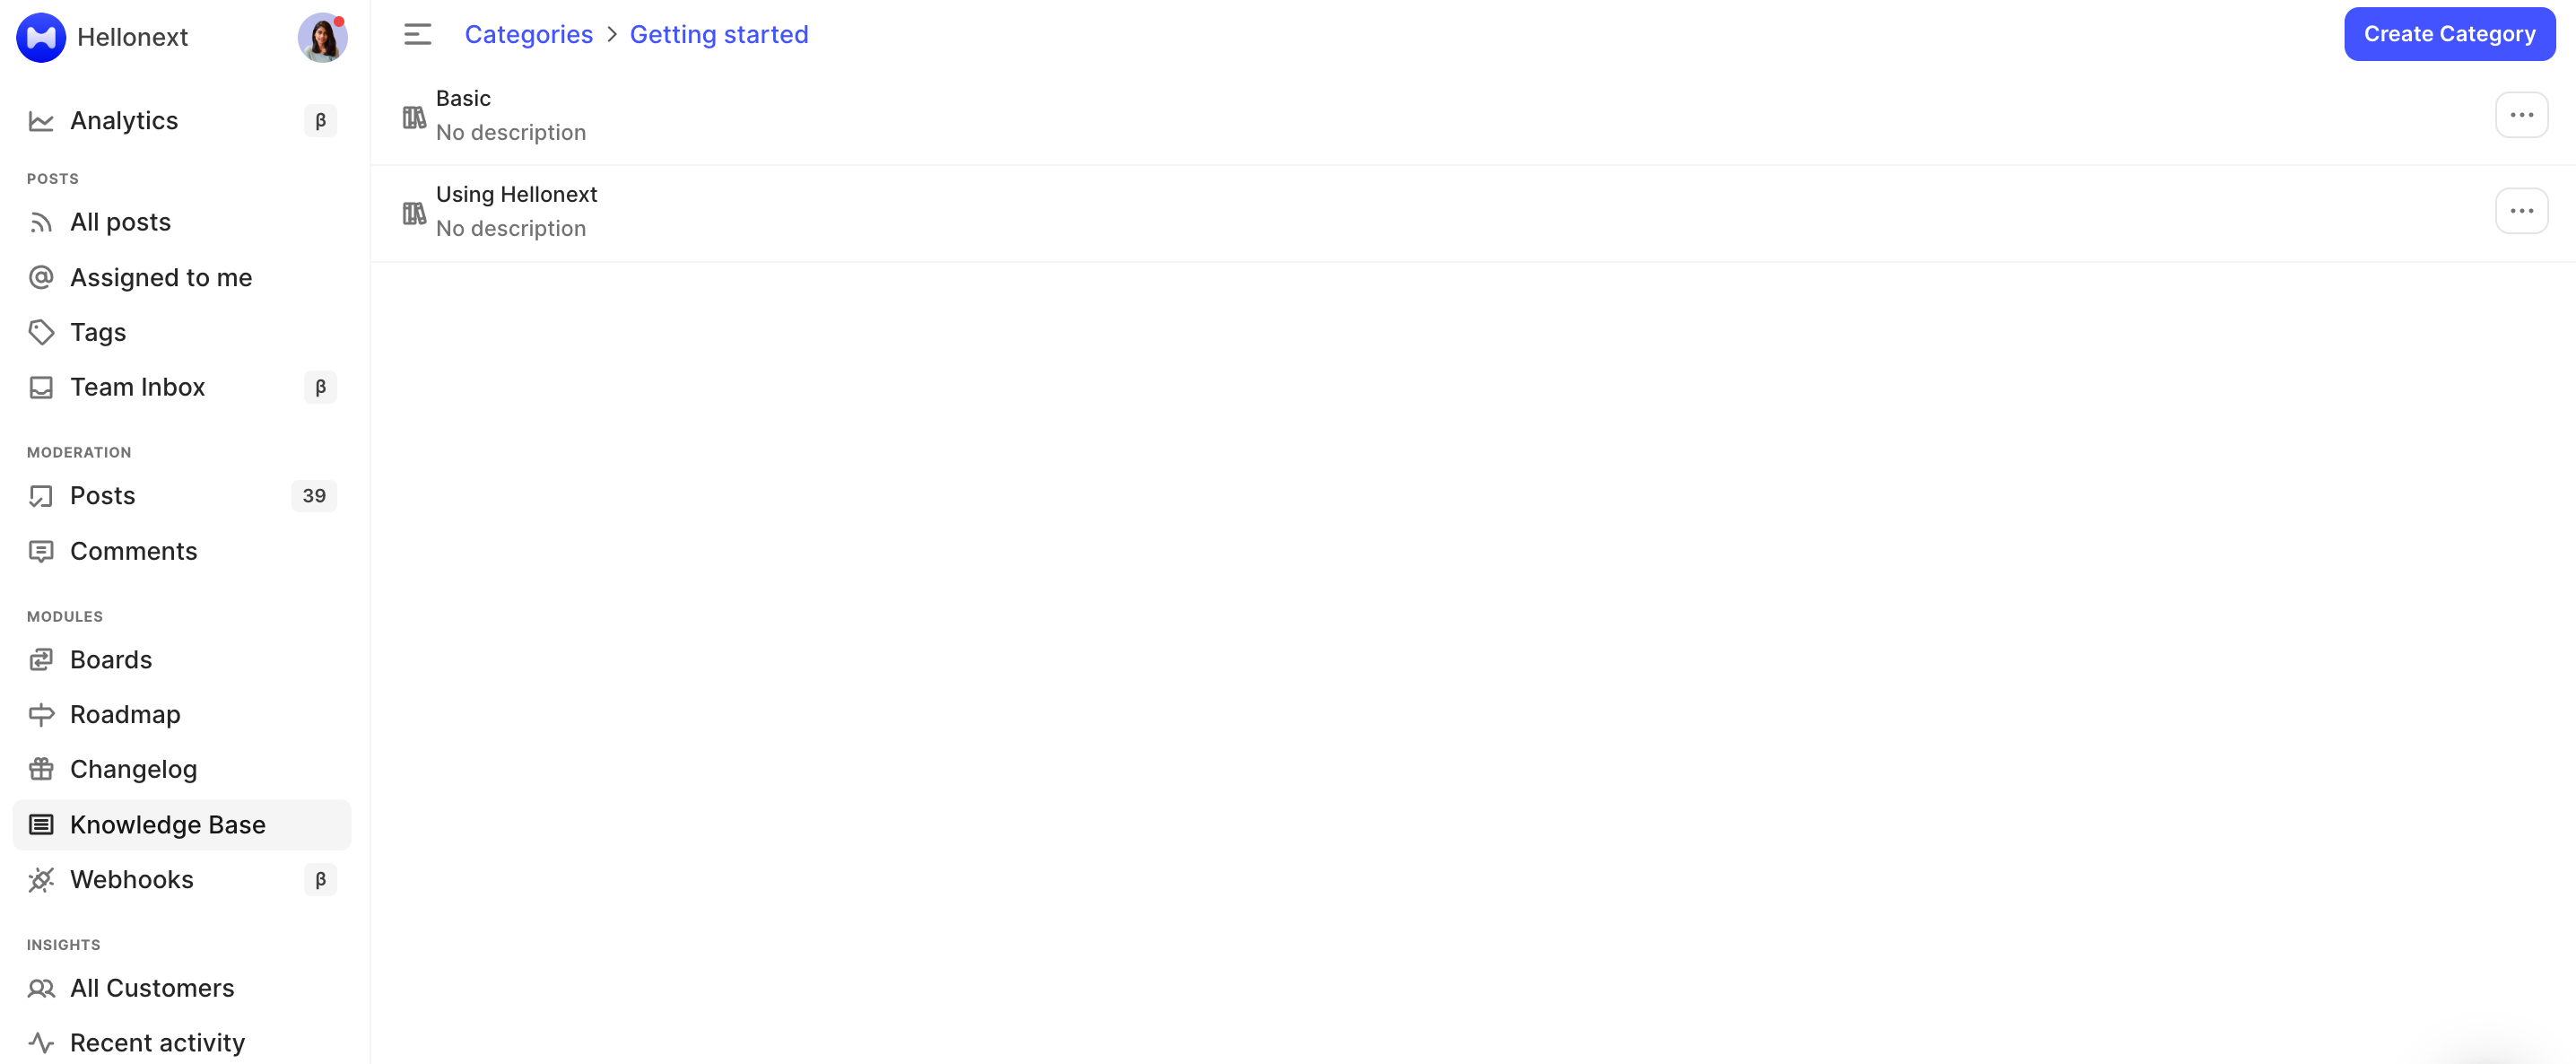
To classify your articles for the convenience of your users, narrow down to what they are looking for, we’ve given options to create Categories and Sub categories. Here’s how you can do that:
Navigate to your Dashboard → choose Knowledge Base module, over the left.
Toggle to Categories → click on Create Category.
You can set a category name and description (optional).
Click on Add once done.
-
To create a sub category, select the specific category and click on Create Category.
And you’re all set now! Start creating articles on the fly and delight your customers! ✨🥂
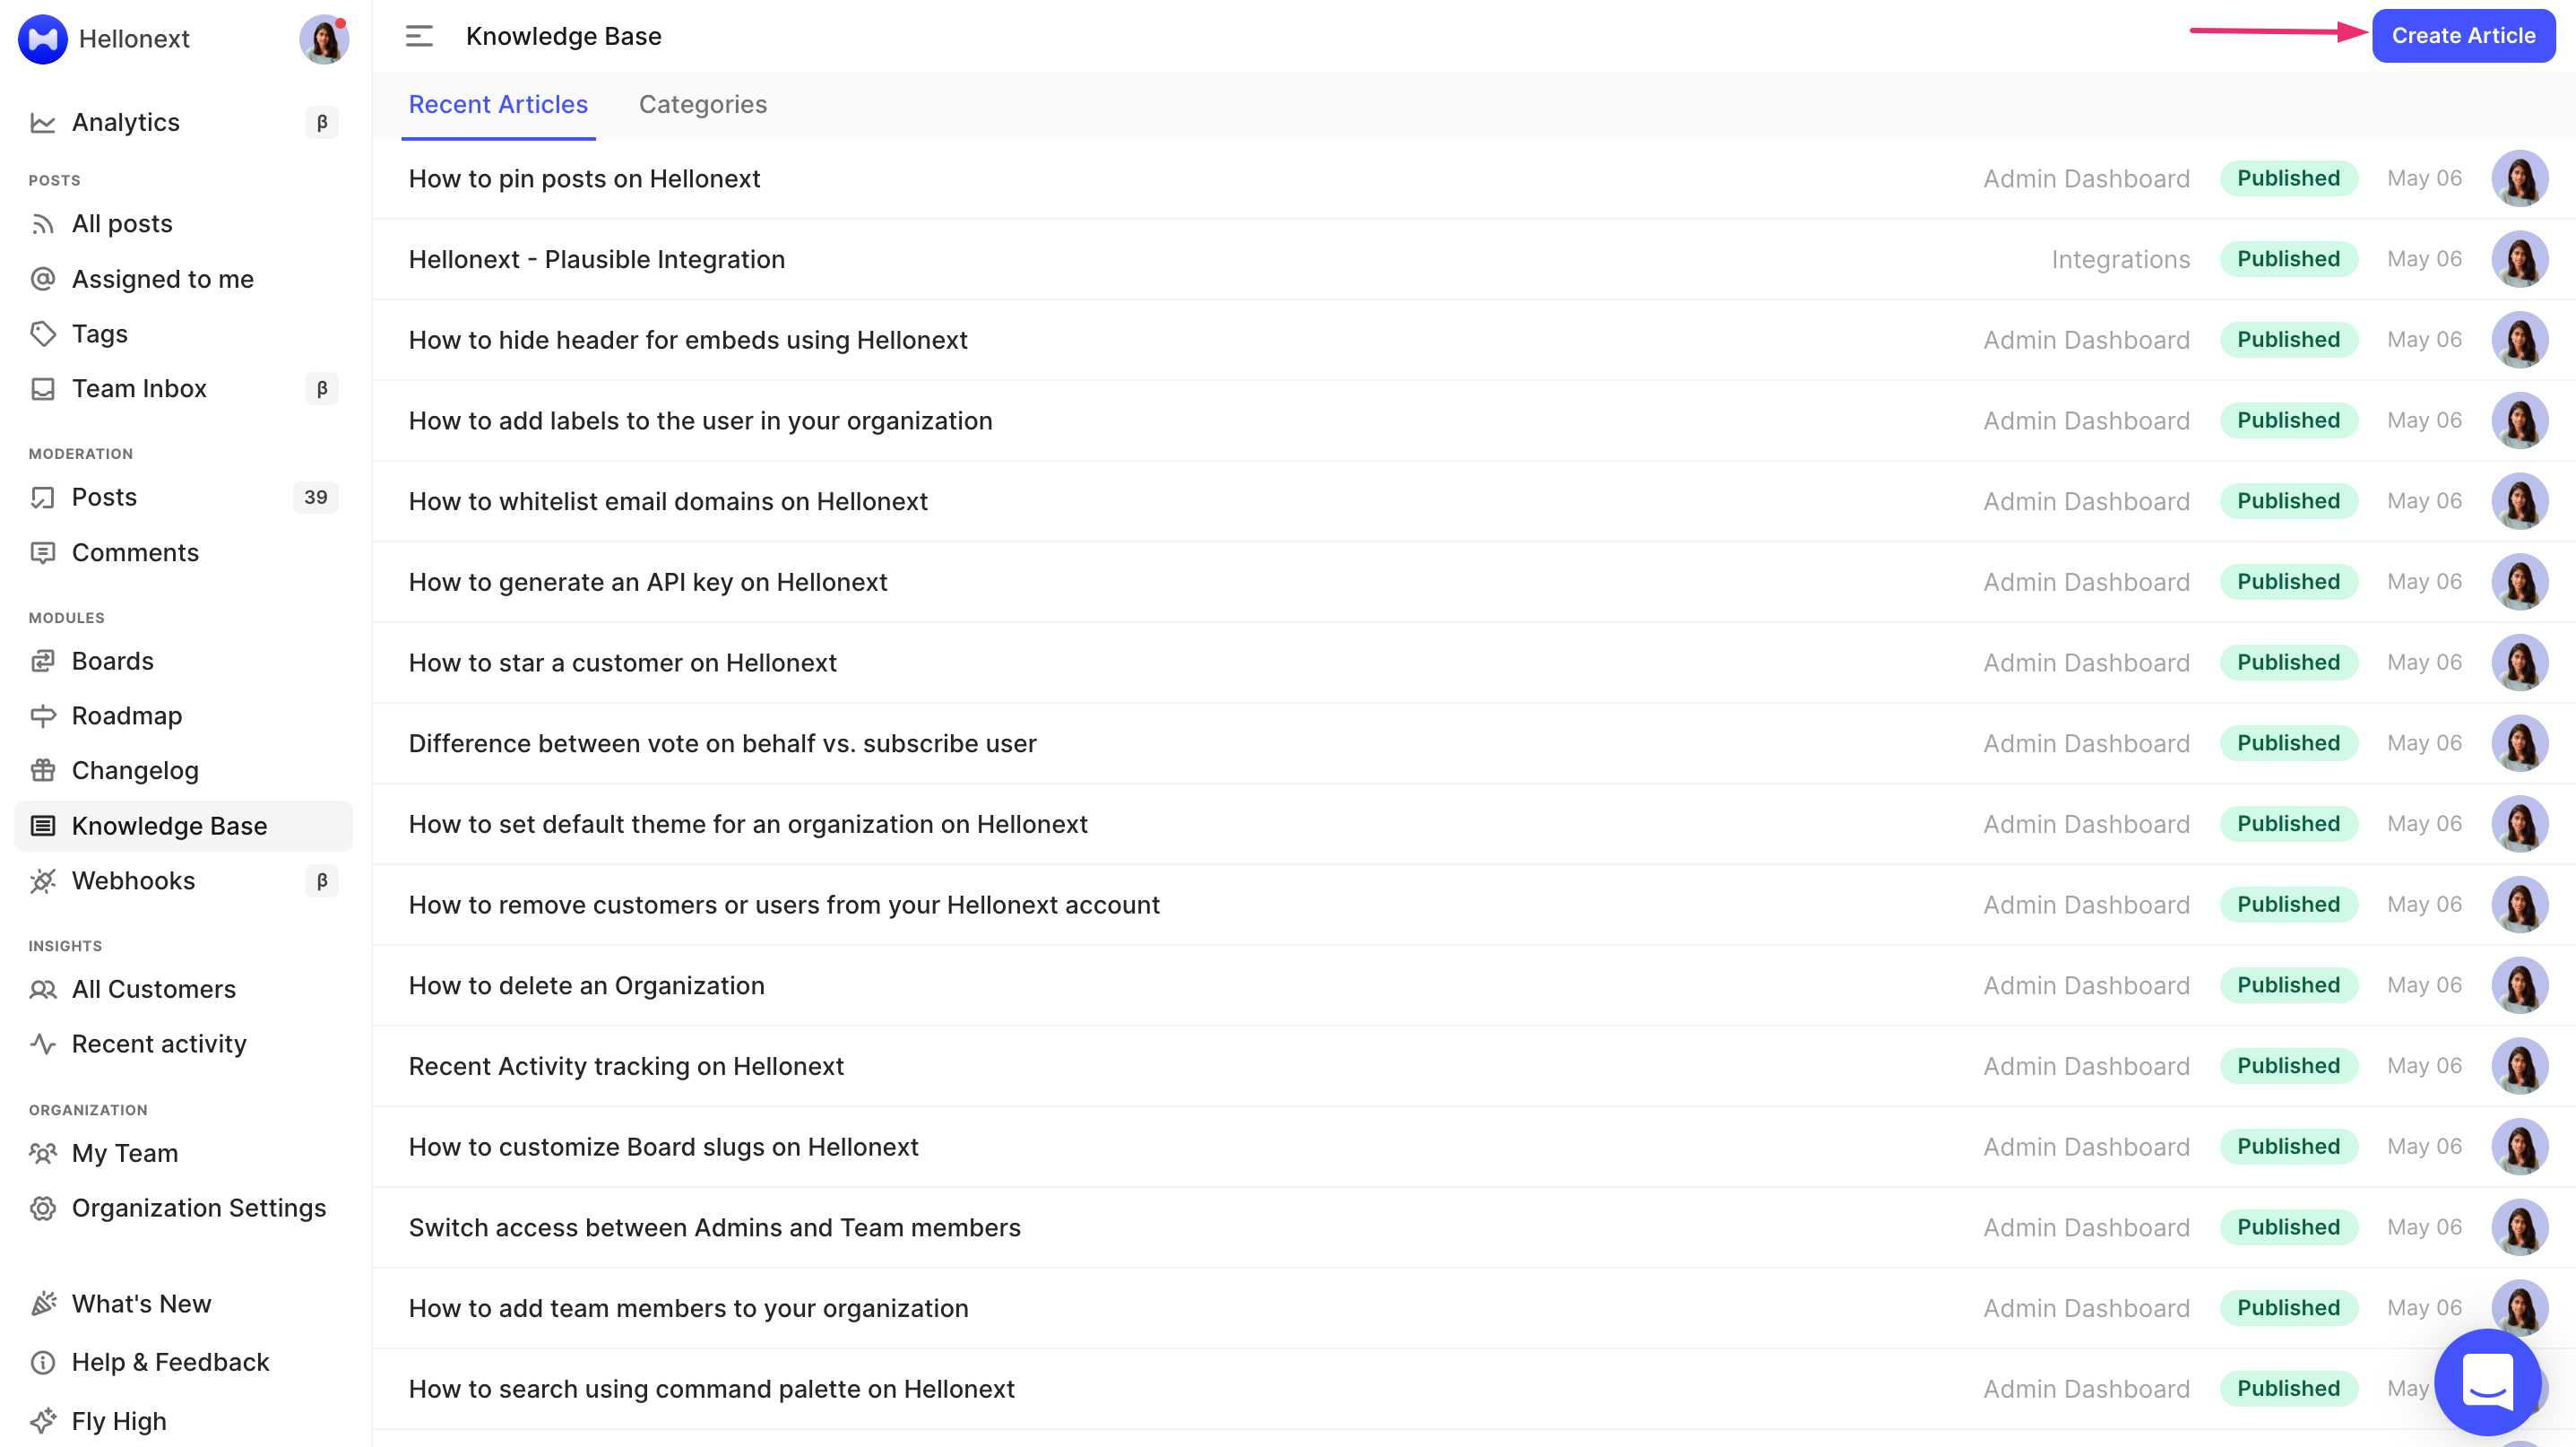
Creating and publishing help articles on Hellonext
I’ll walk you through a step by step guide as I create one of our help articles! Let’s get started now! 😃
Navigate to your Dashboard → choose Knowledge Base over the left.
-
Click on Create article.
-
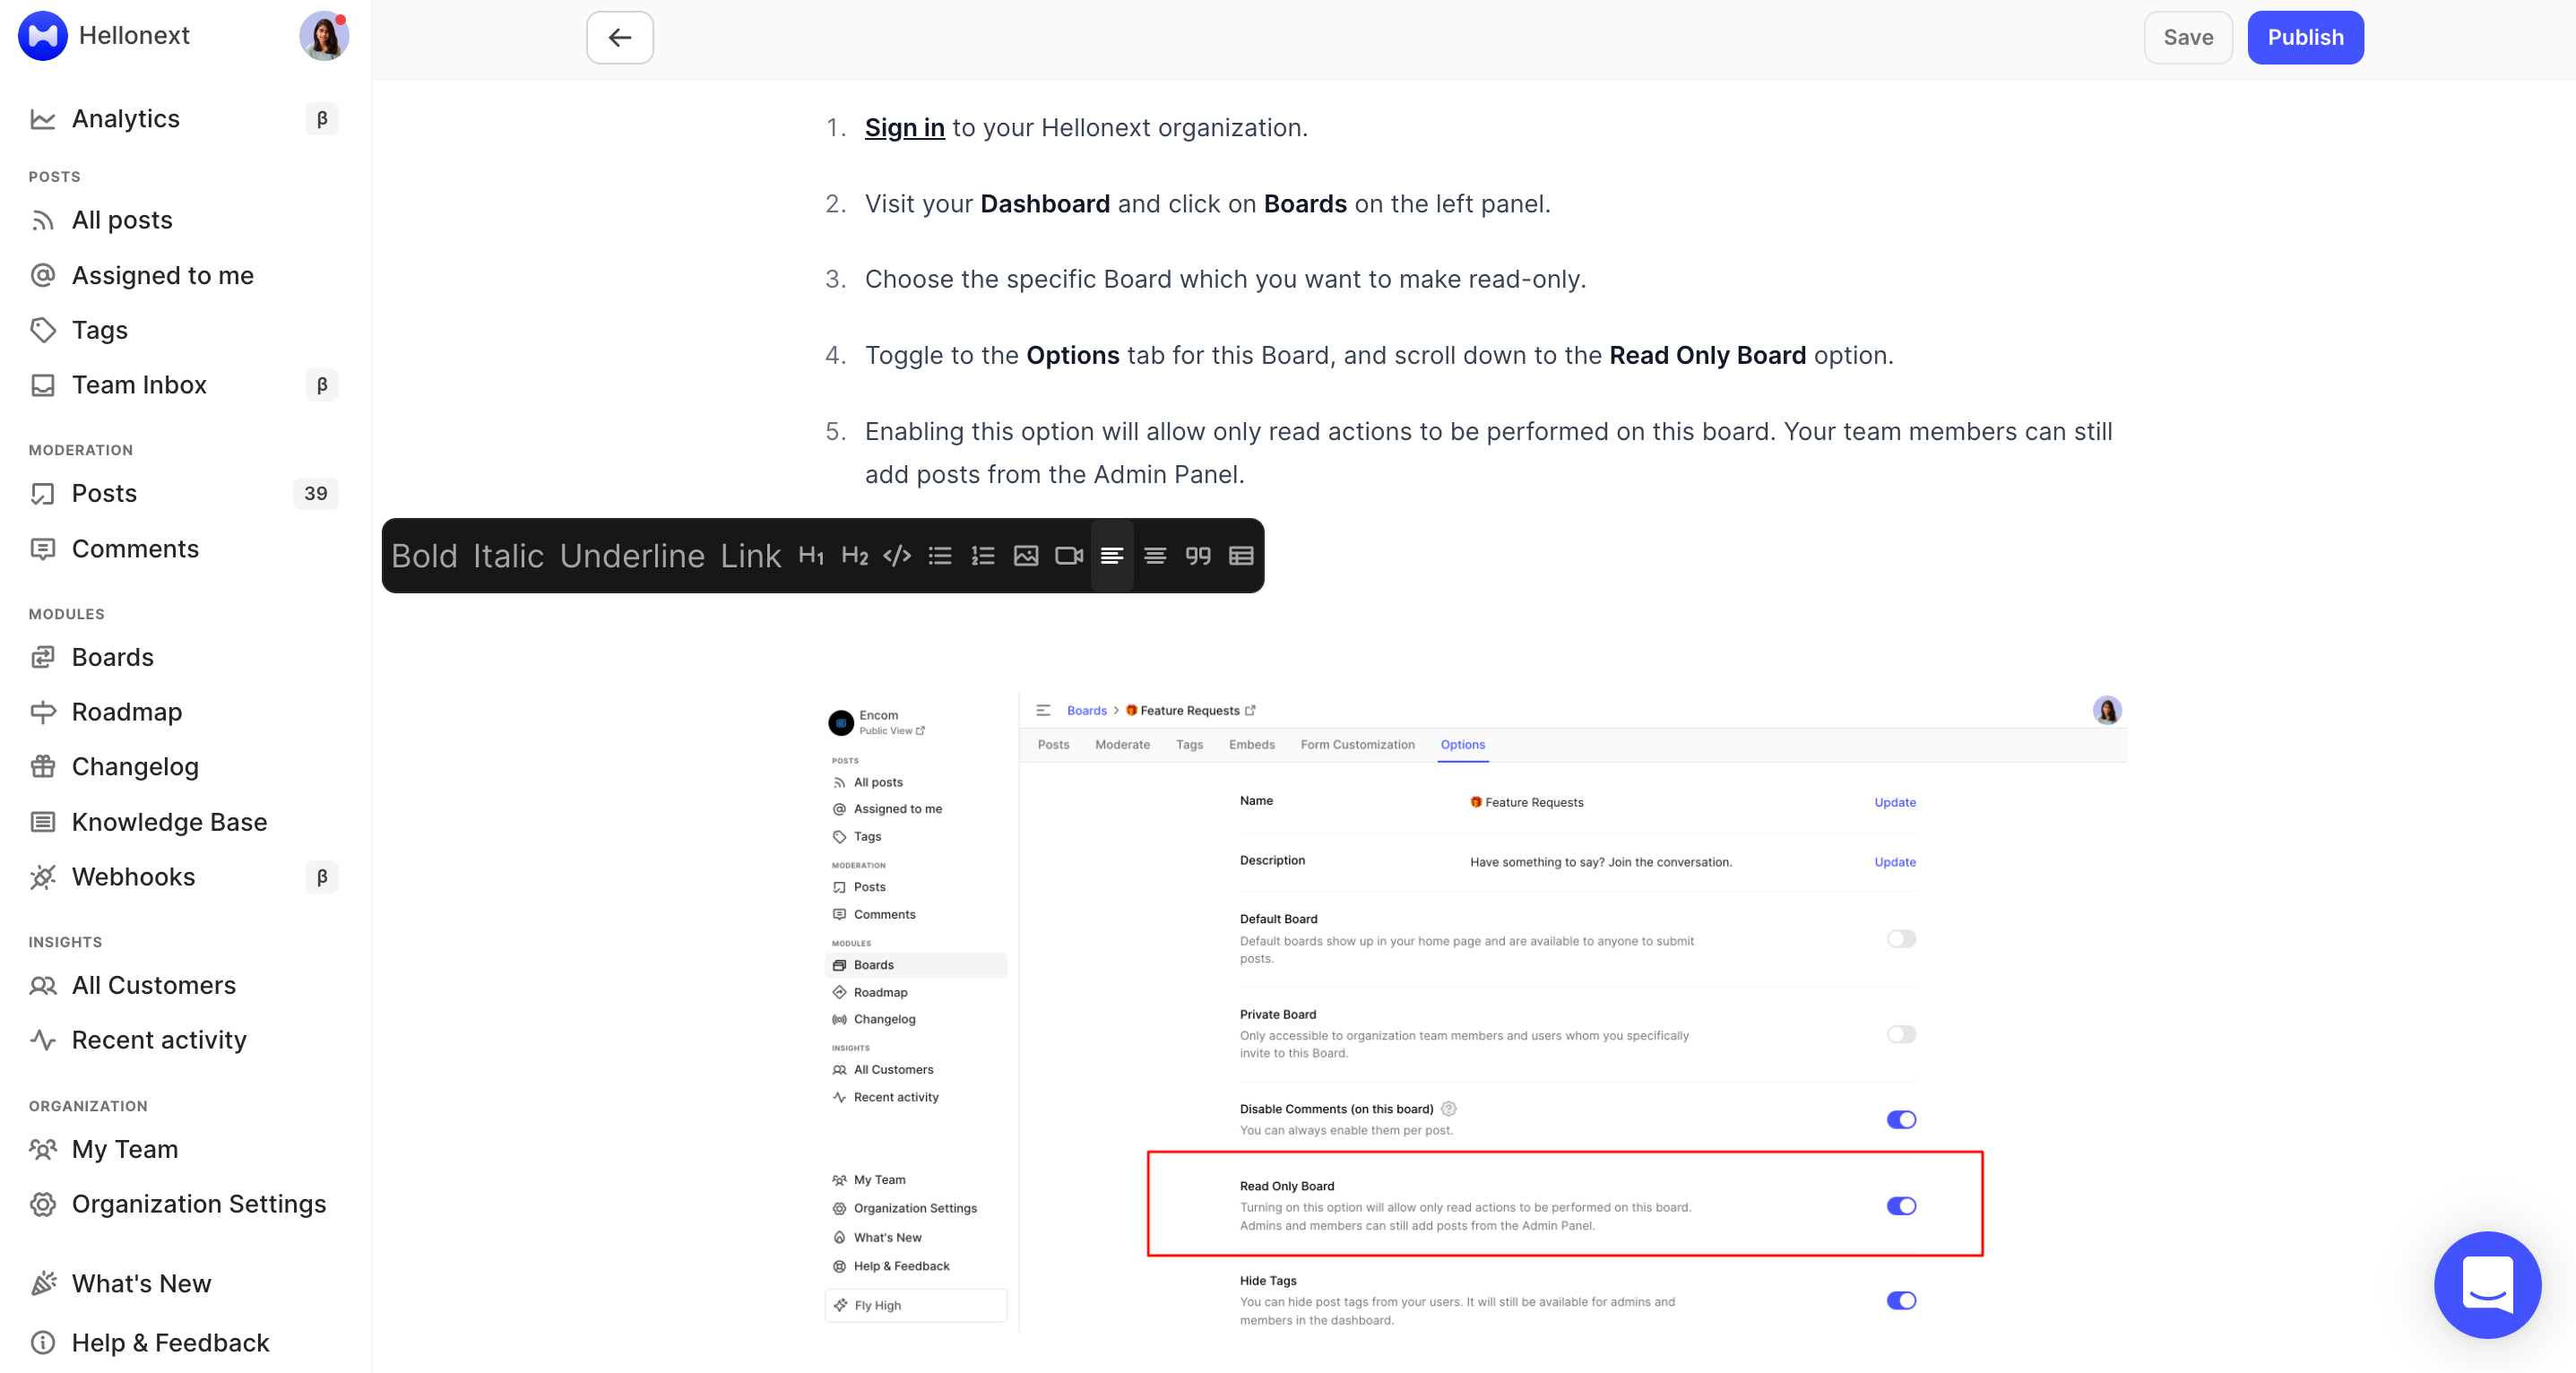
Enter a title, followed by the description of your article. You have various formatting options to text. emphasis (bold, italics, underline), insert hyperlinks, header tags, add a code block, a quote, alignment and listing options.

-
On a new line, you also get options to include tables, image attachments and YouTube videos.
-
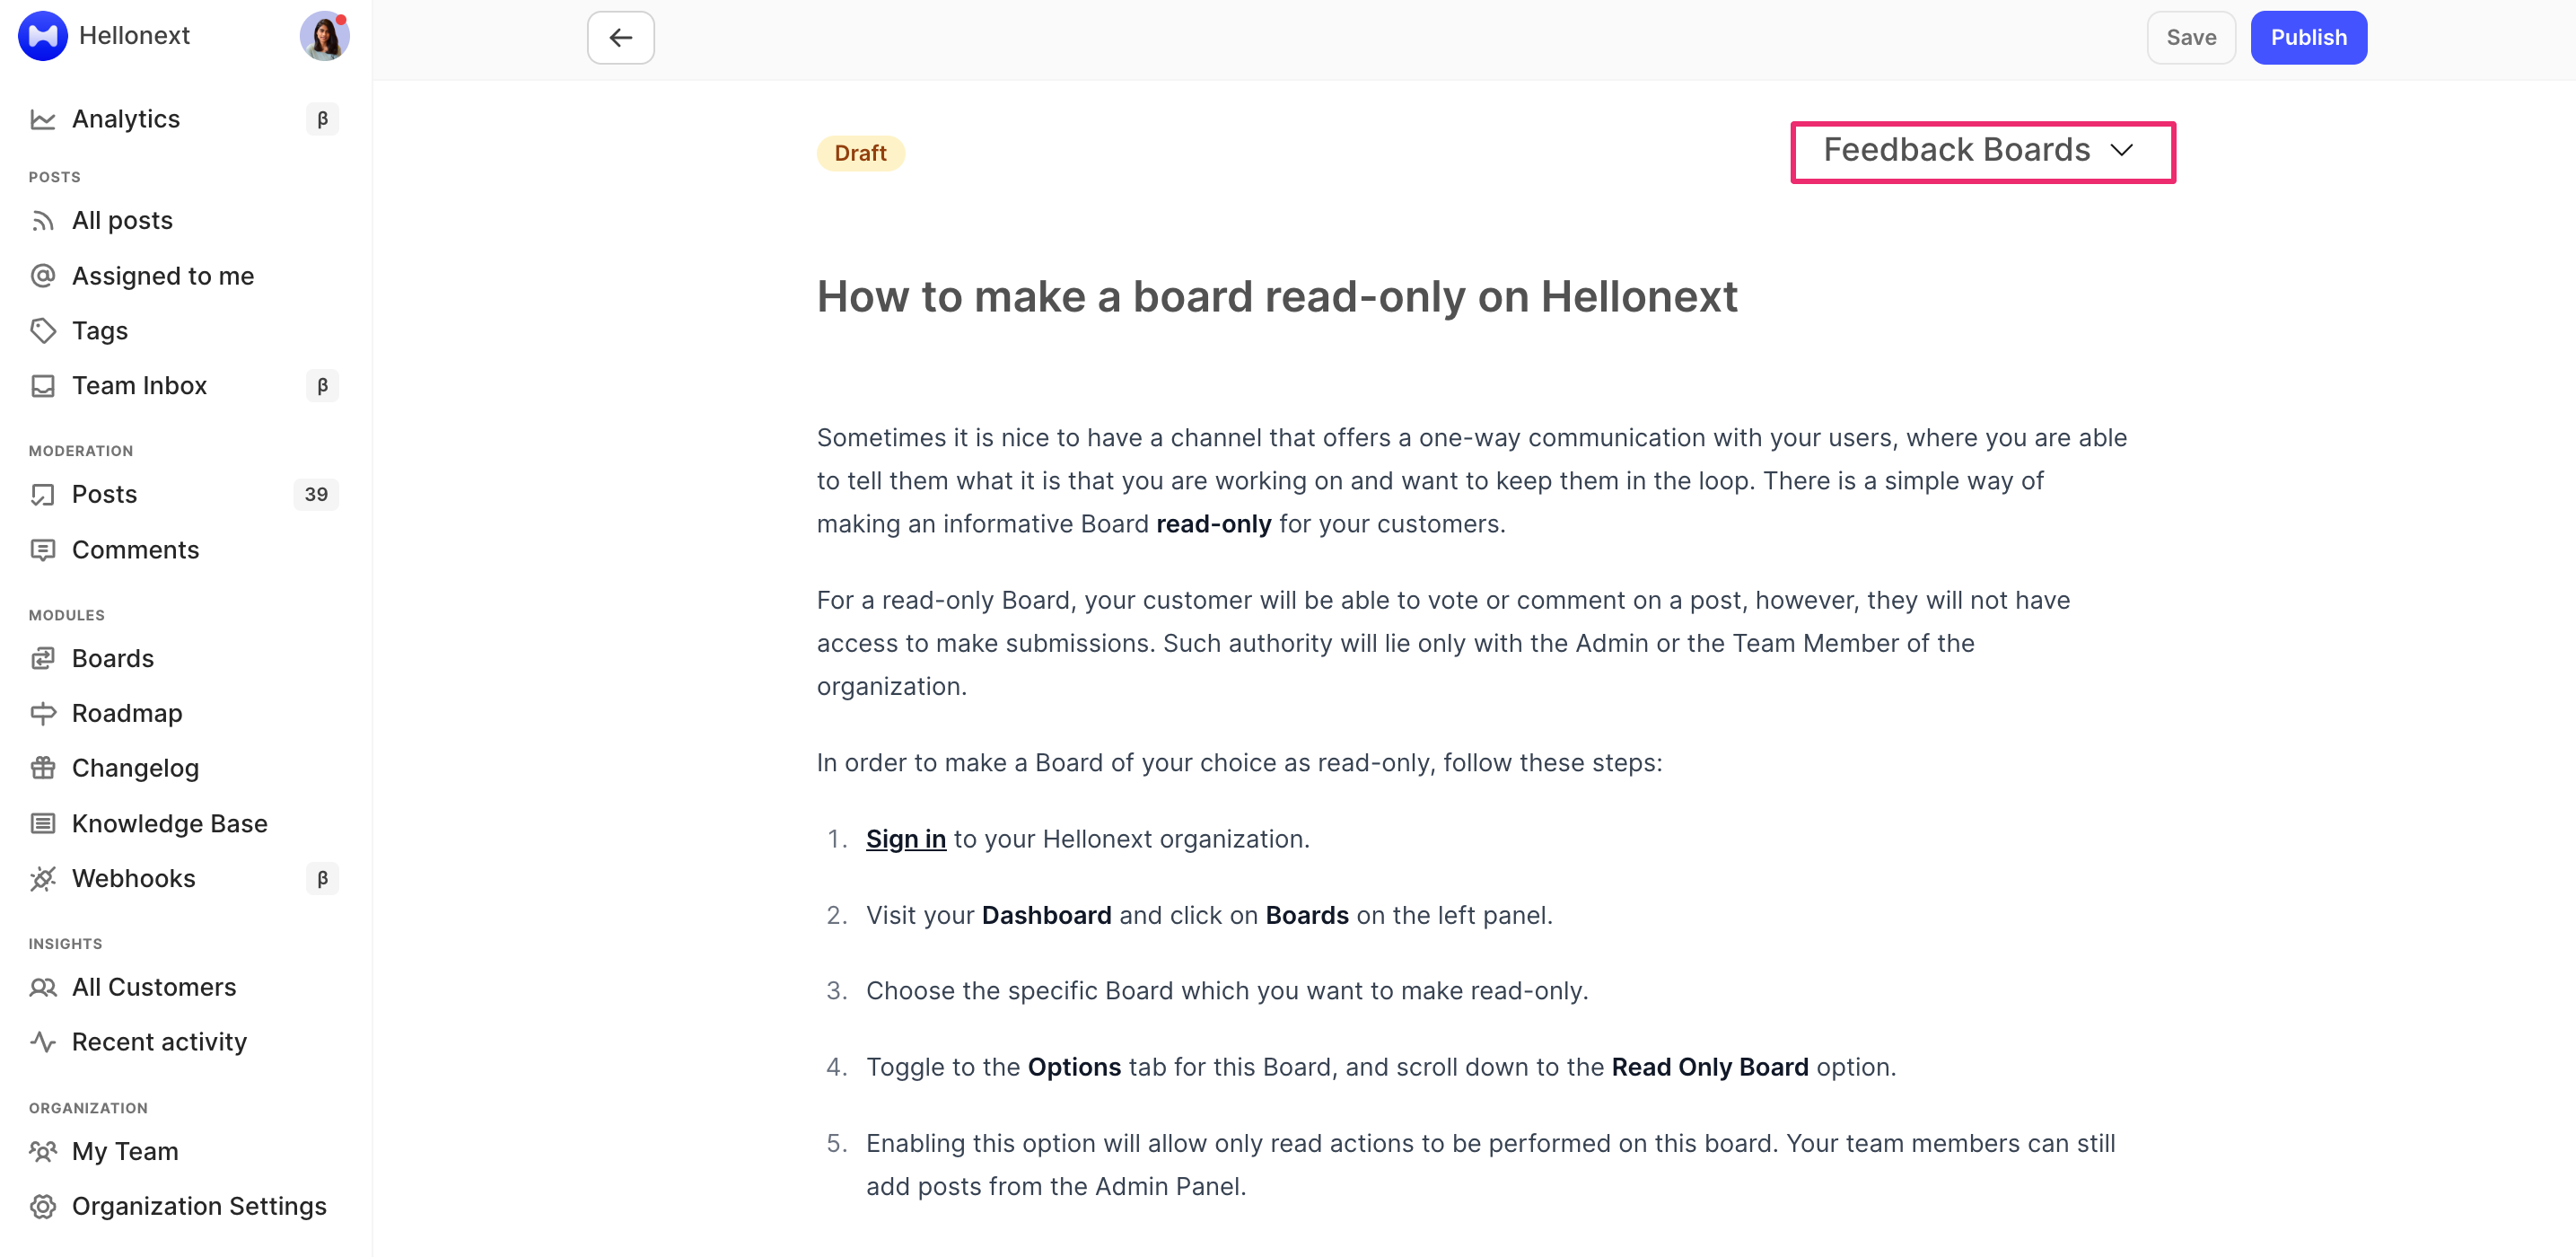
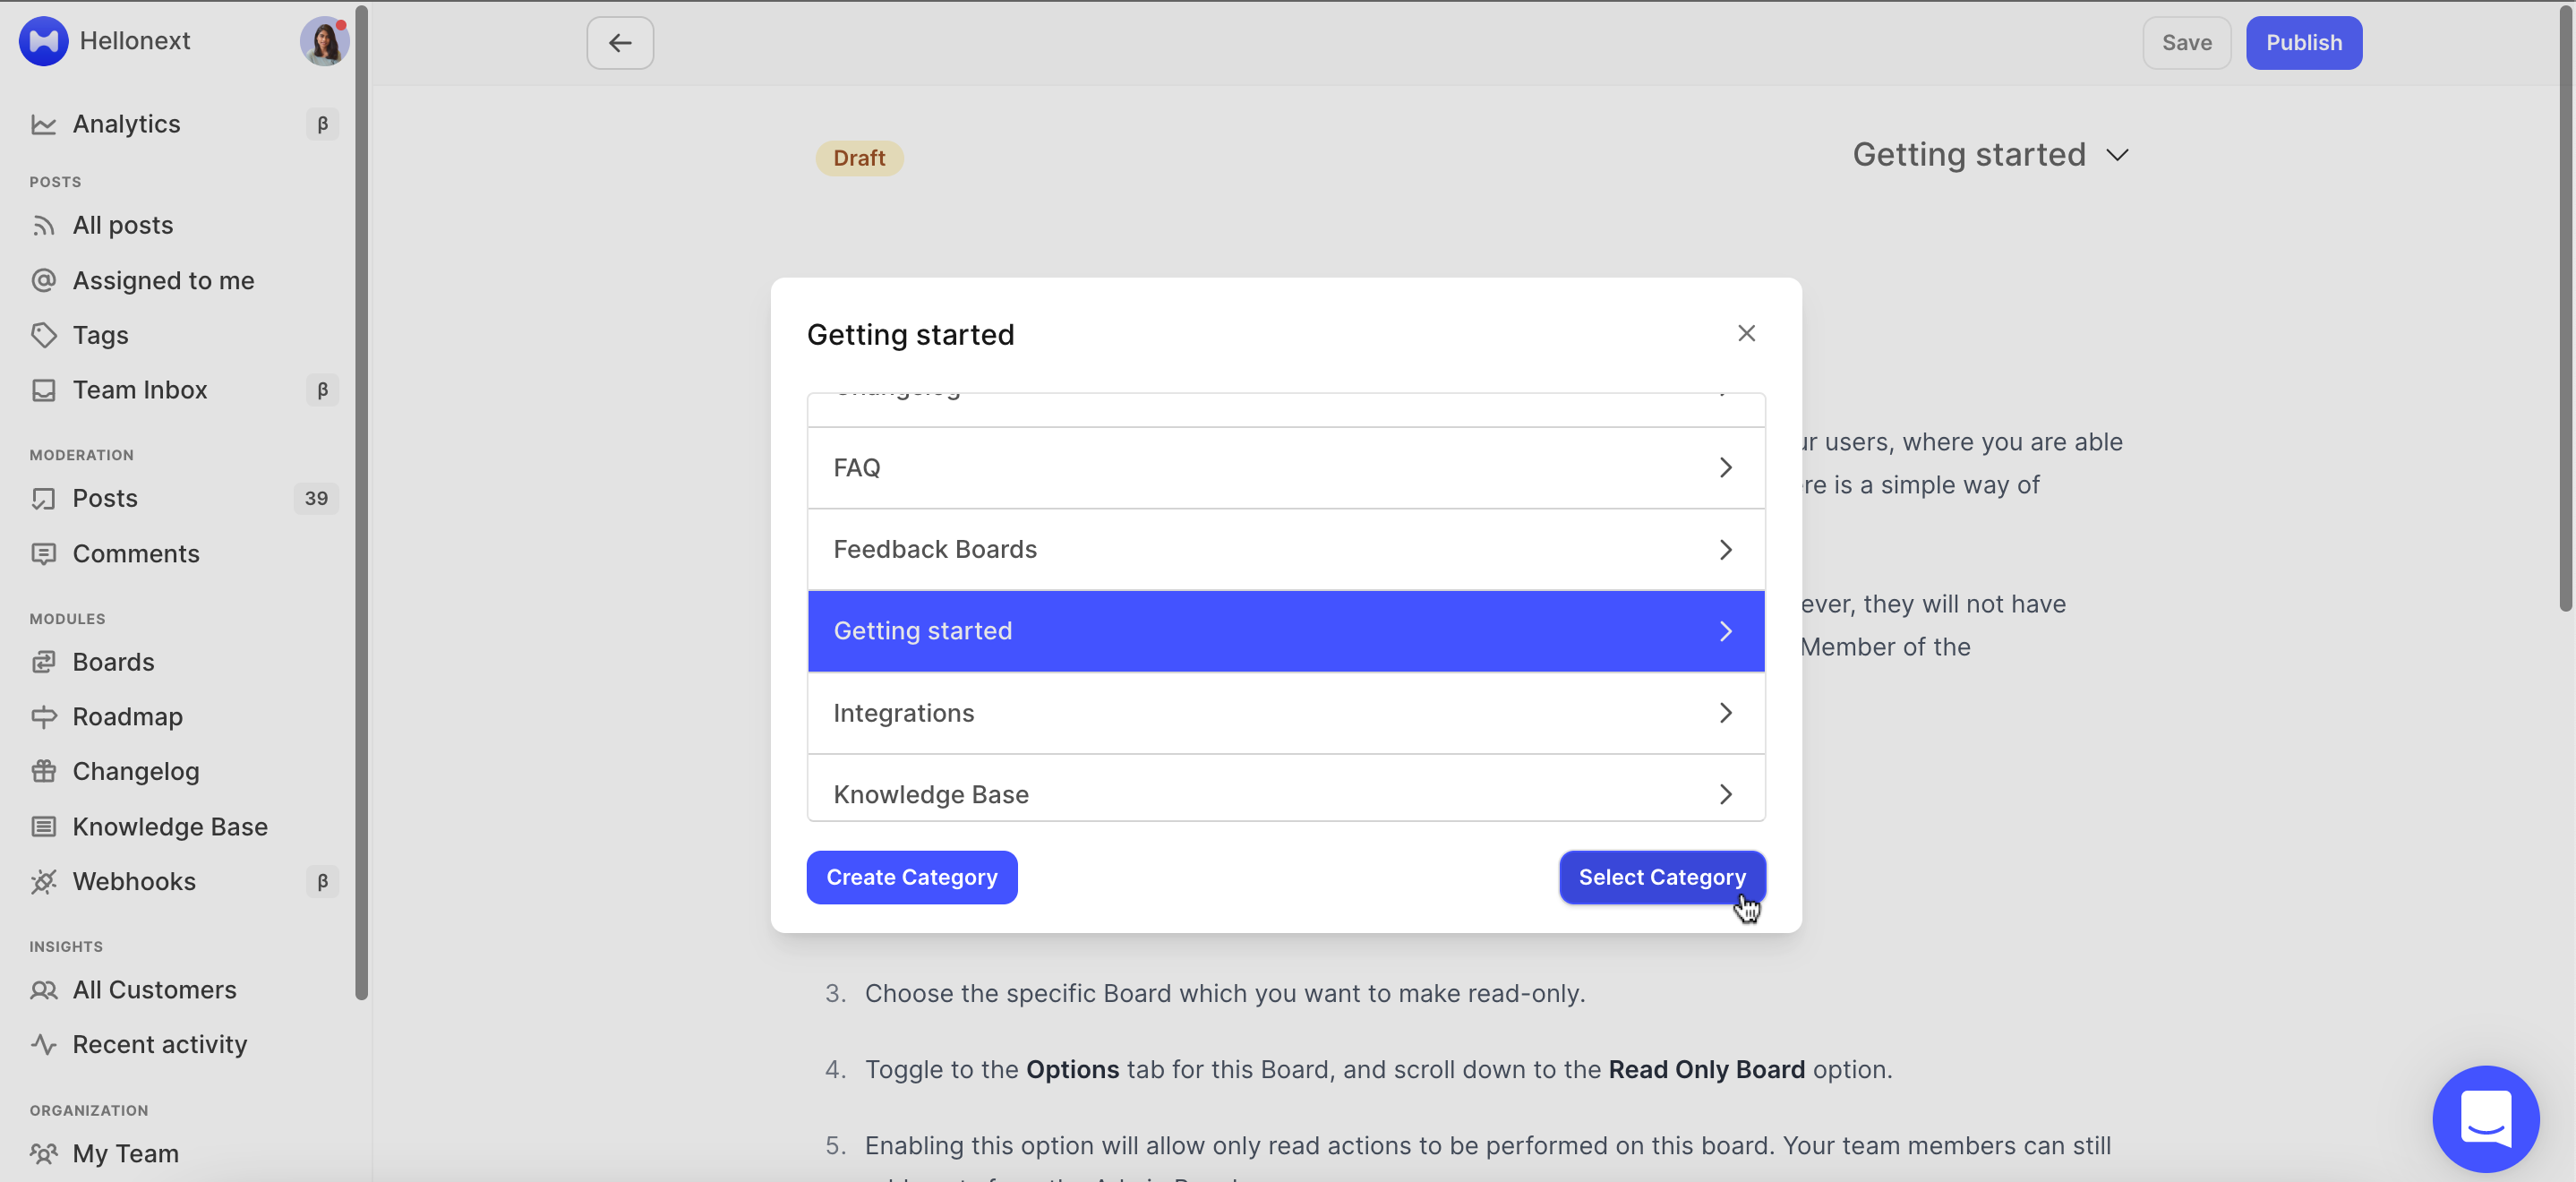
Use the categories drop down on the top-right to map this article to one of the categories you’ve created, if needed.
Note: When not mapped to a category, the article gets assigned to the default category, Getting Started.
-
You can click on the Select Category and choose a sub category is required.
Once done, you can click on Save on the top to store the article as a draft. If you’d like to publish the article to your users, you can click on the Publish button.
-
Here’s the published article all set for your user’s read through! Take a look! ✨😄
https://feedback.hellonext.co/kb/article/how-to-make-a-board-read-only-on-hellonext
If you do have any suggestions, feel free to reach out to us at your convenience! We are always happy to help! 🙌🏼🚀😁