We all know how amazing it is to have a widget be placed on your own website, right? Now imagine this widget showing up all you recent product updates. Well, with Hellonext this is more than possible!
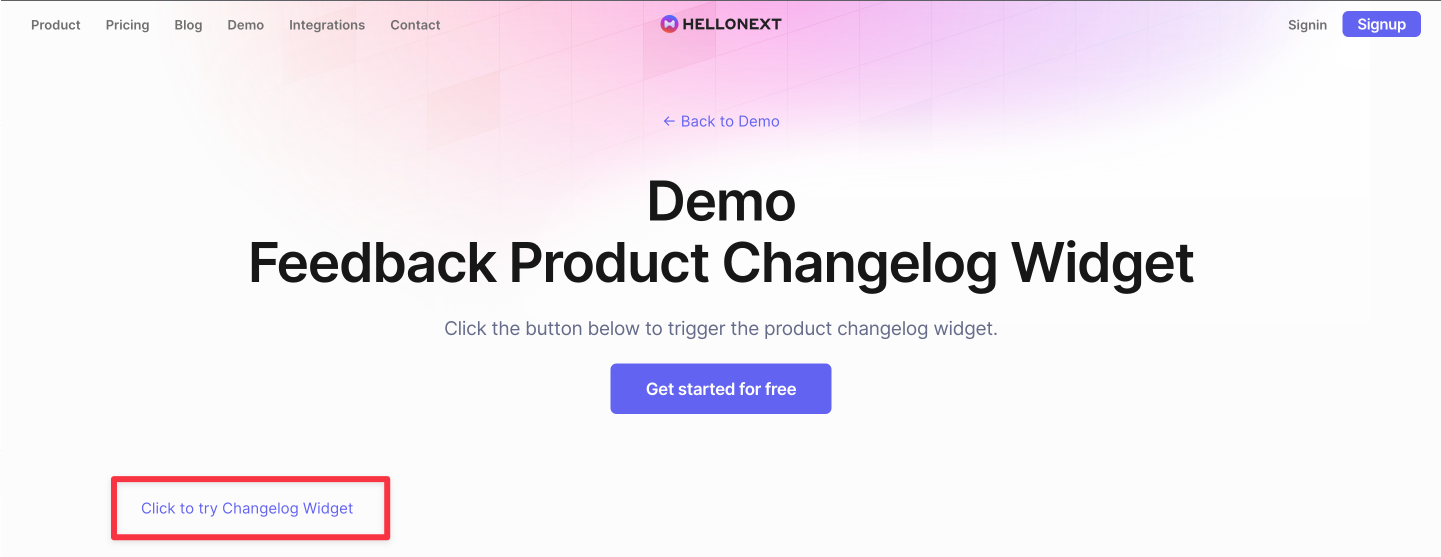
Let’s say you have a Click here to try button on your product like the one shown below, here's a workflow example, to integrate your Hellonext changelog widget so your users can see your latest changelogs.
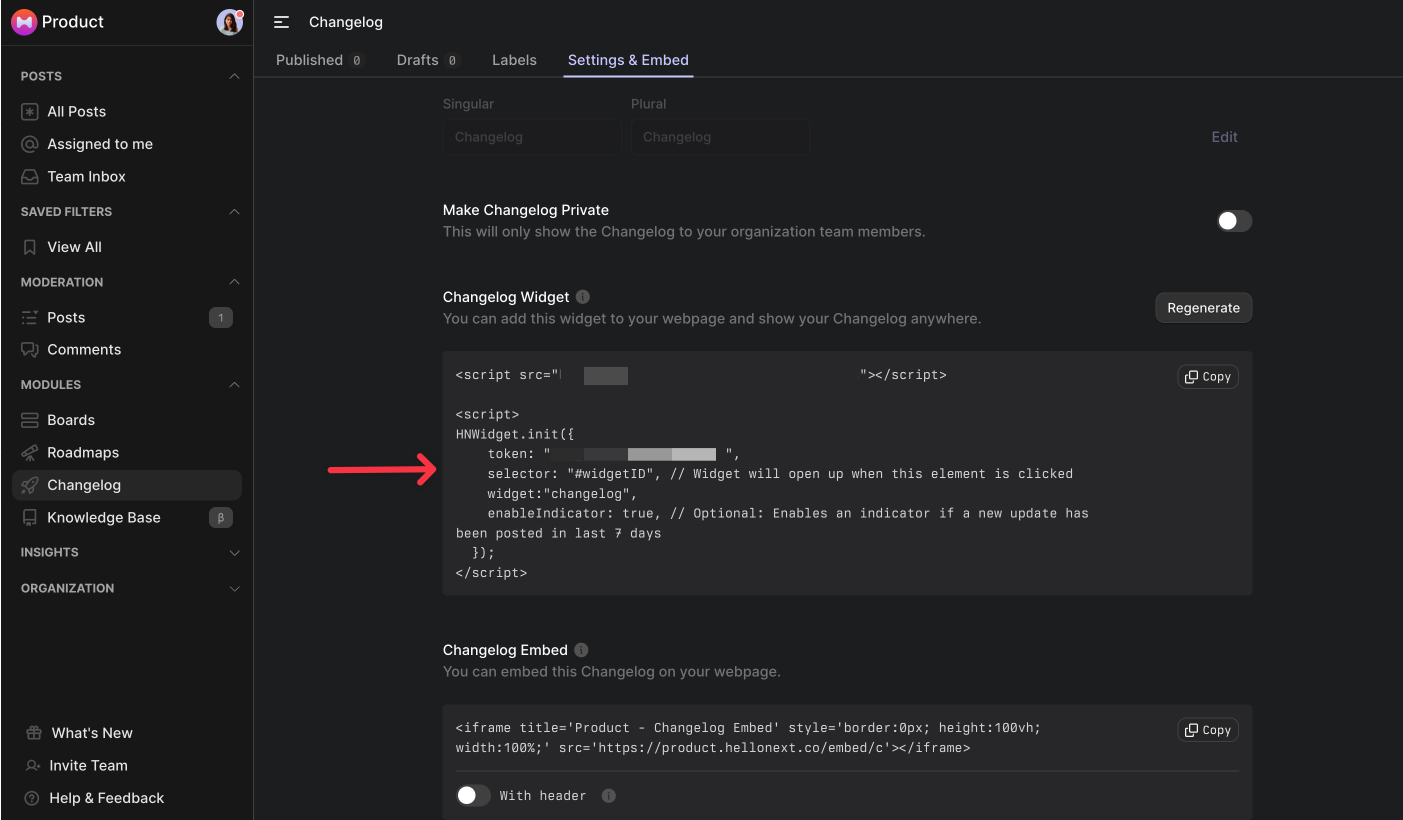
Just sign into your organization’s page and head on over to your Dashboard.
Go onto your Changelog on the left panel.
Here you will find Settings & Embed on the far right of the Changelog section.
Once there, you will scroll down and see the Changelog Widget section.
-
Click on Copy in order to paste into your source code and place your Changelog widget anywhere!
How to use the snippet?
Let’s now integrate the snippet in our website!
-
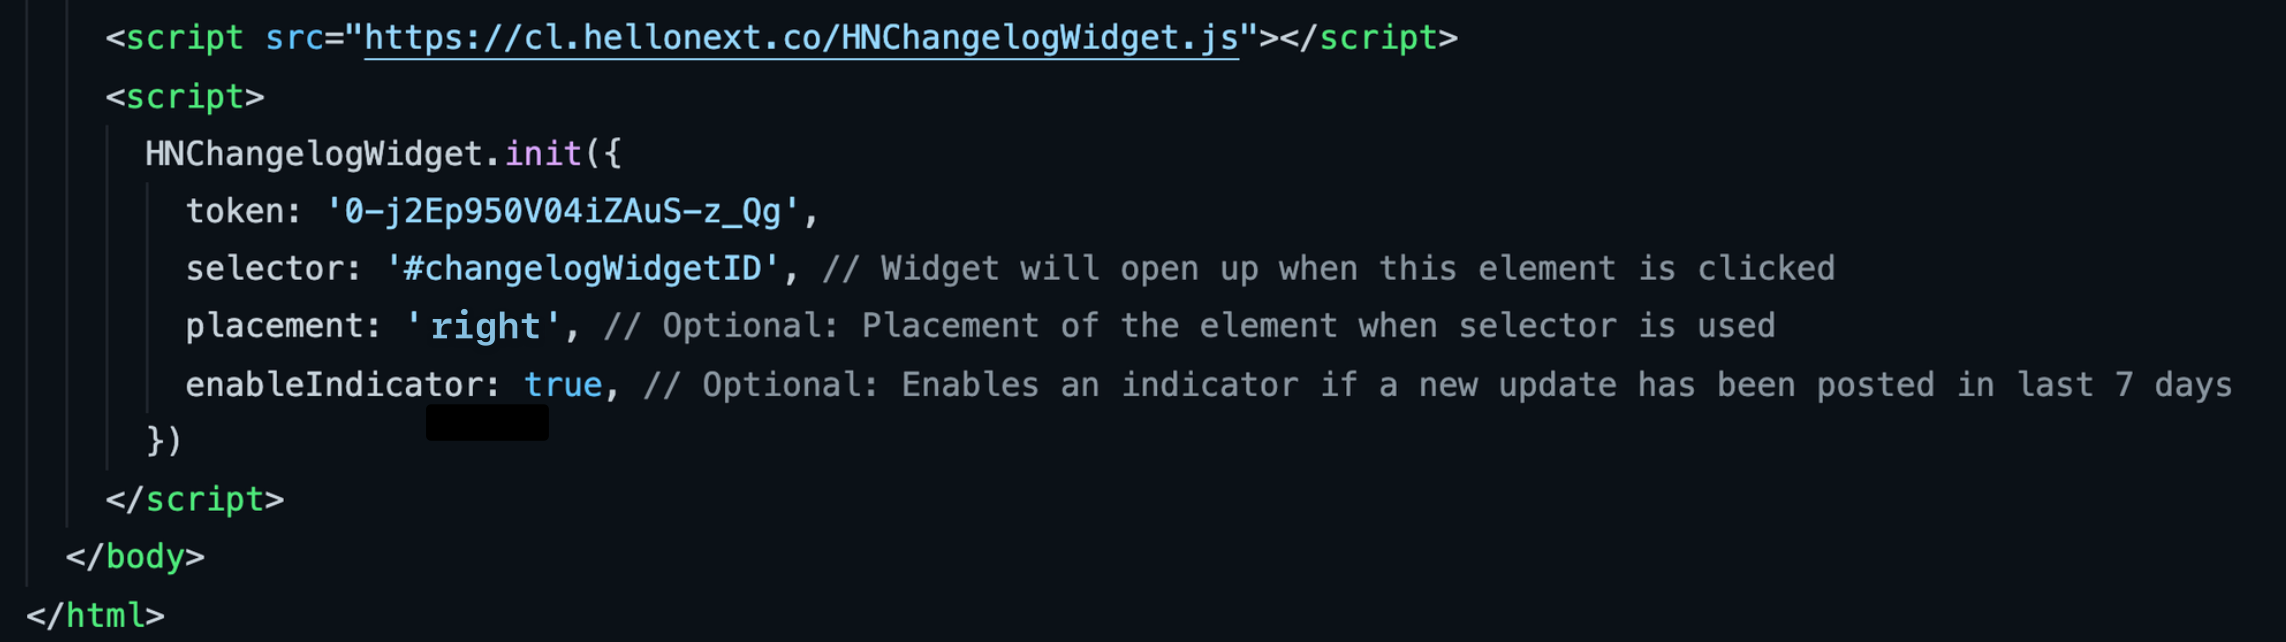
Create a button with an id of
changelogWidgetID. -
Paste the copied changelog snippet and paste in just before the closing body tag. That's it!
When you click on the button now, you can see the changelog widget added there.

How to Customize the Widget?
Selector config:
You can use the selector config to change the change the id that the changelog widget will look up. You can even use a class name or data-attribute for this.
Placement config:
The placement will determine the position the widget will show up from, possible locations are left and right.
Enable Indicator config:
This will show a small red indicator next to the trigger button if there is a new update in the last 7 days. You can change it to false if you don’t need it.
Do feel free to reach out to us if any queries should arise! 😃✨🚀