ClickUp is a collaborative, project management and productivity platform for managing your tasks all in one place. ClickUp provides tools and features to complete work in an efficient, visible, and accessible way.
Hellonext now provides an effective two way integration with ClickUp and thereby letting you map your customer feedback in Hellonext with tasks in ClickUp. This integration setup also allows you to keep your customers informed about the status updates made on their feedback.
This article covers:
How to Authorize and Connect ClickUp with Hellonext
-
Setting up rules for the two way integration
Enable Automatic Push to ClickUp
Set status sync rules
-
How the Integration setup works
Create a ClickUp task
Link ClickUp Tasks
Status Update
Unlink a ClickUp task from a Hellonext post
Disconnect Hellonext - ClickUp Integration
Step 1 : Authorize and Connect ClickUp with Hellonext
Begin with signing into your Hellonext account.
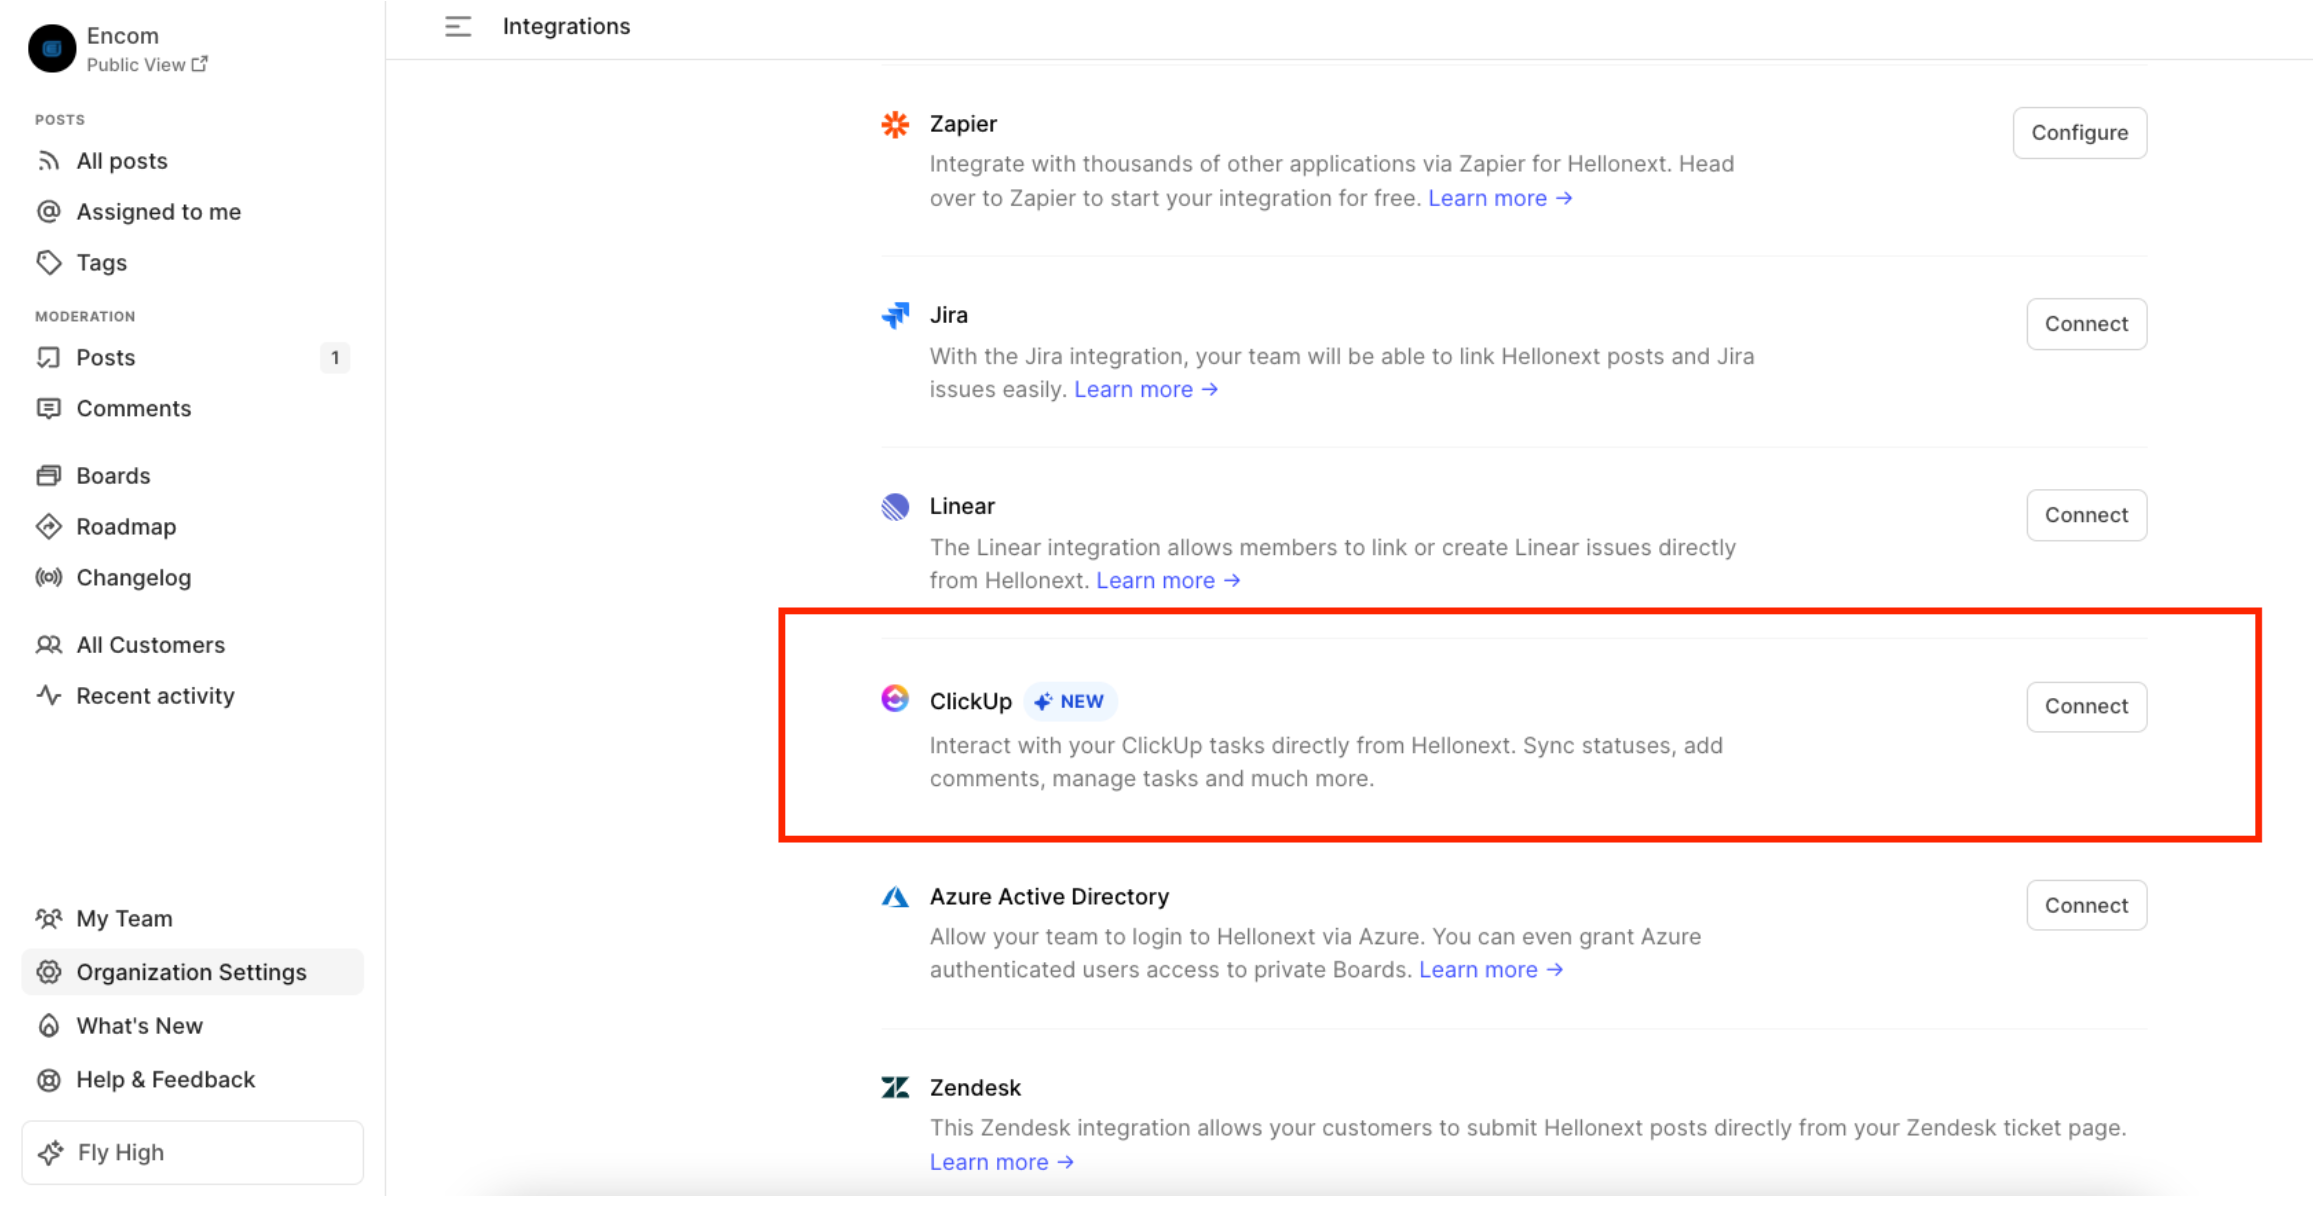
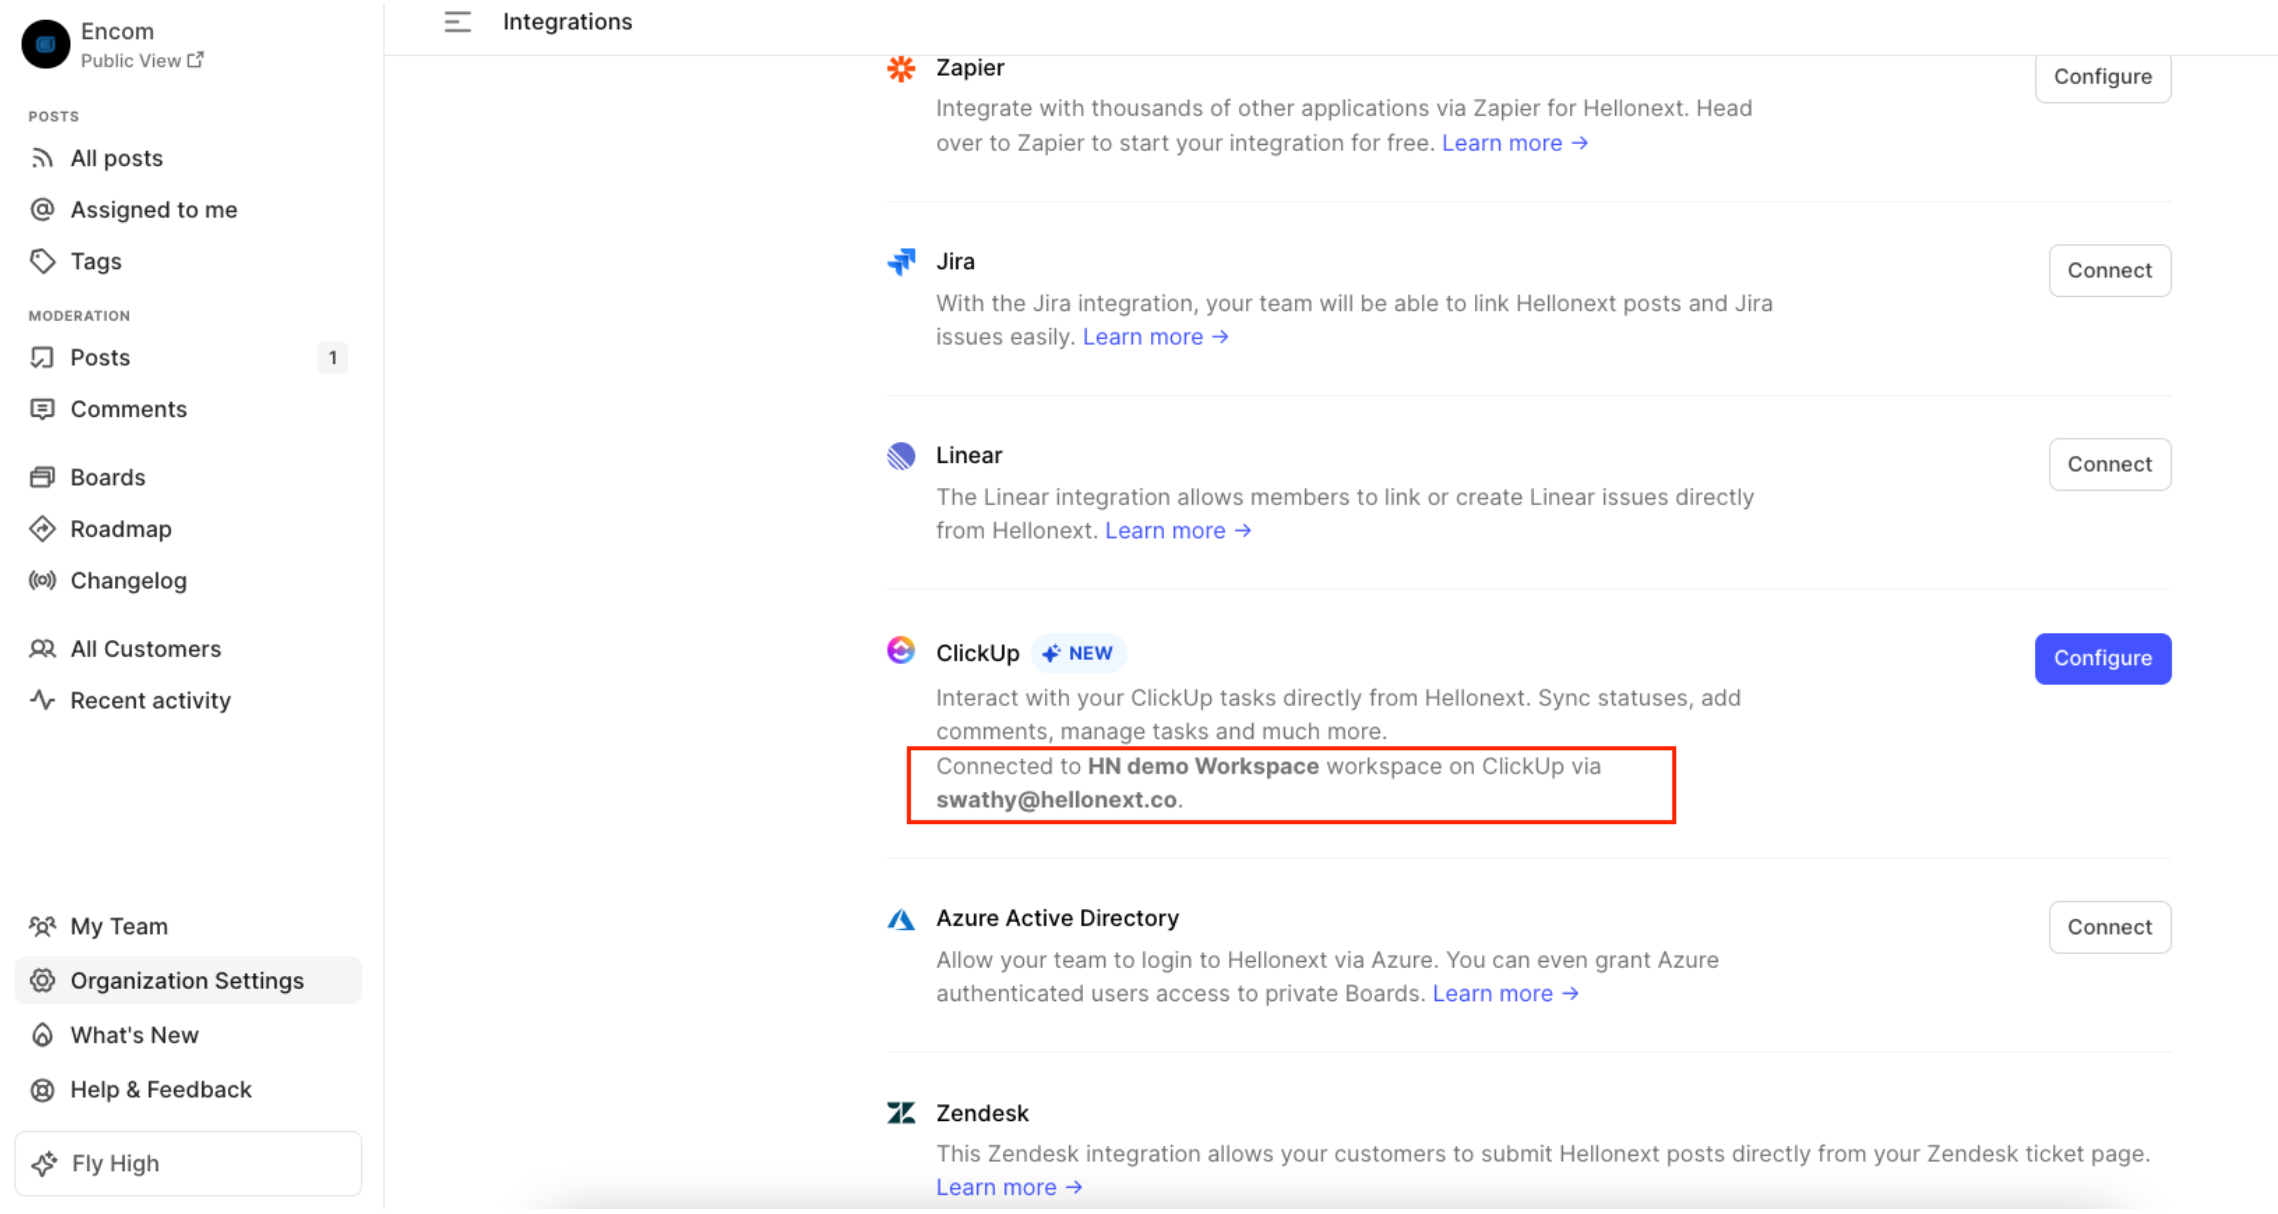
Visit your Dashboard and click on Organization Settings over the left panel.
Toggle to the Integrations tab and scroll down to ClickUp.
-
Click on Connect for ClickUp and you will be redirected to ClickUp’s login page.
-
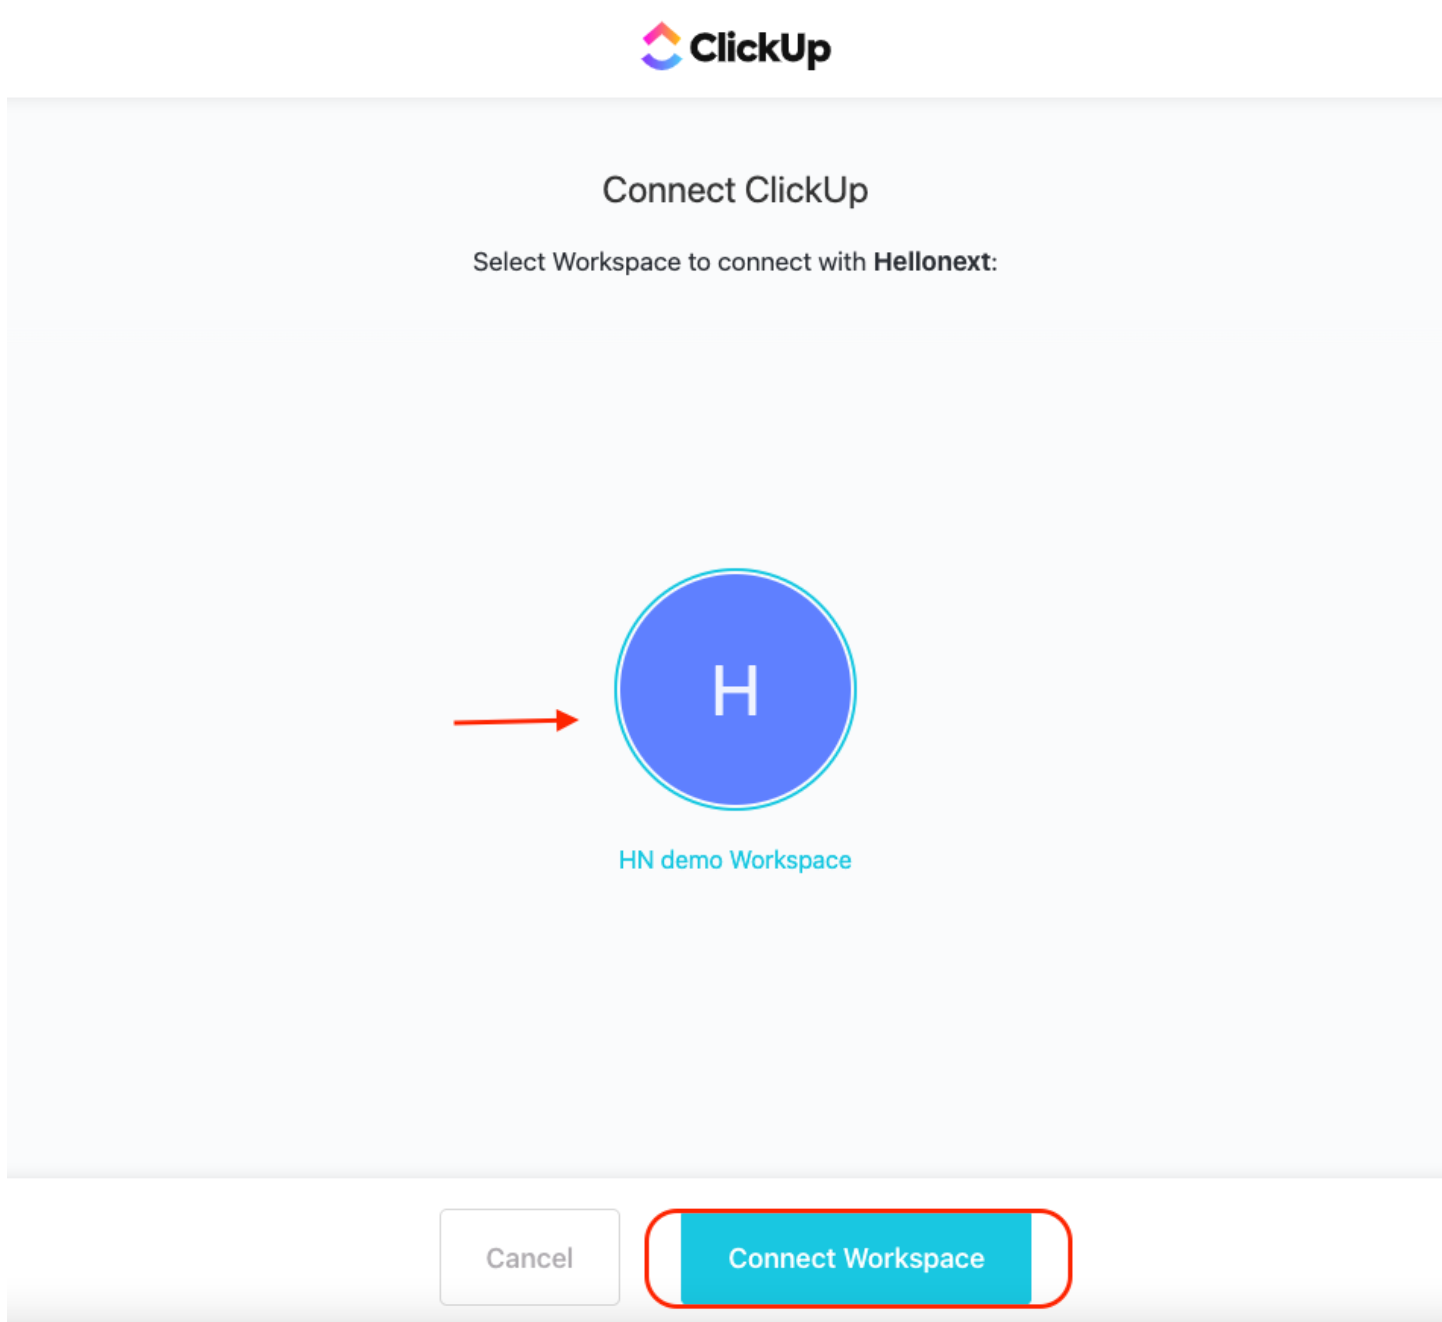
Sign into your ClickUp account, choose your Workspace and click on Connect Workspace.
-
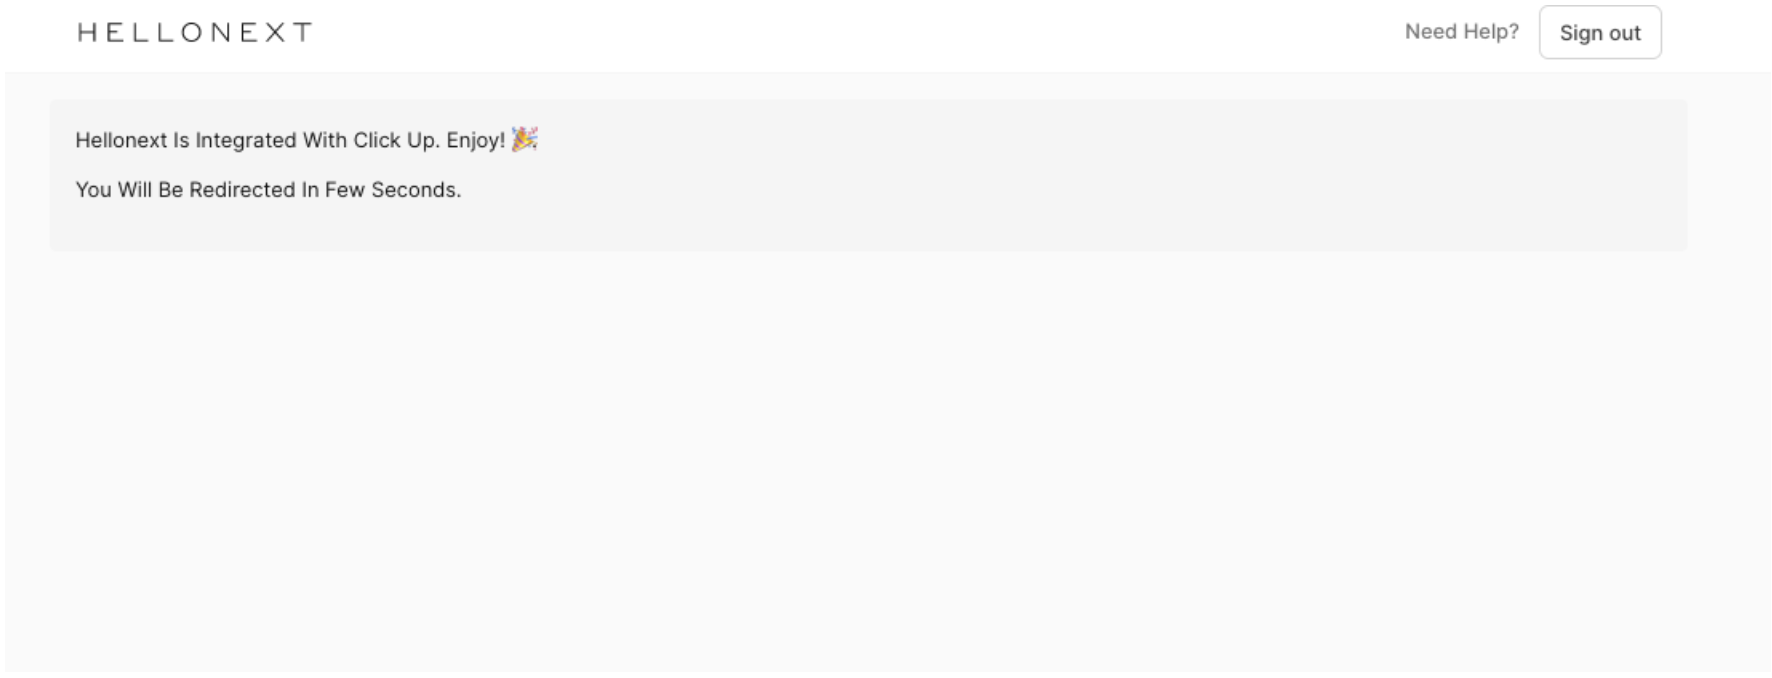
You will redirect back to your Hellonext Integrations page where you can set up rules for the sync.
Step 2: Setting up rules for the two-way integration
Once you get redirected back to your Hellonext organization your landing page will include a popup modal for you to proceed with the ClickUp Configuration.
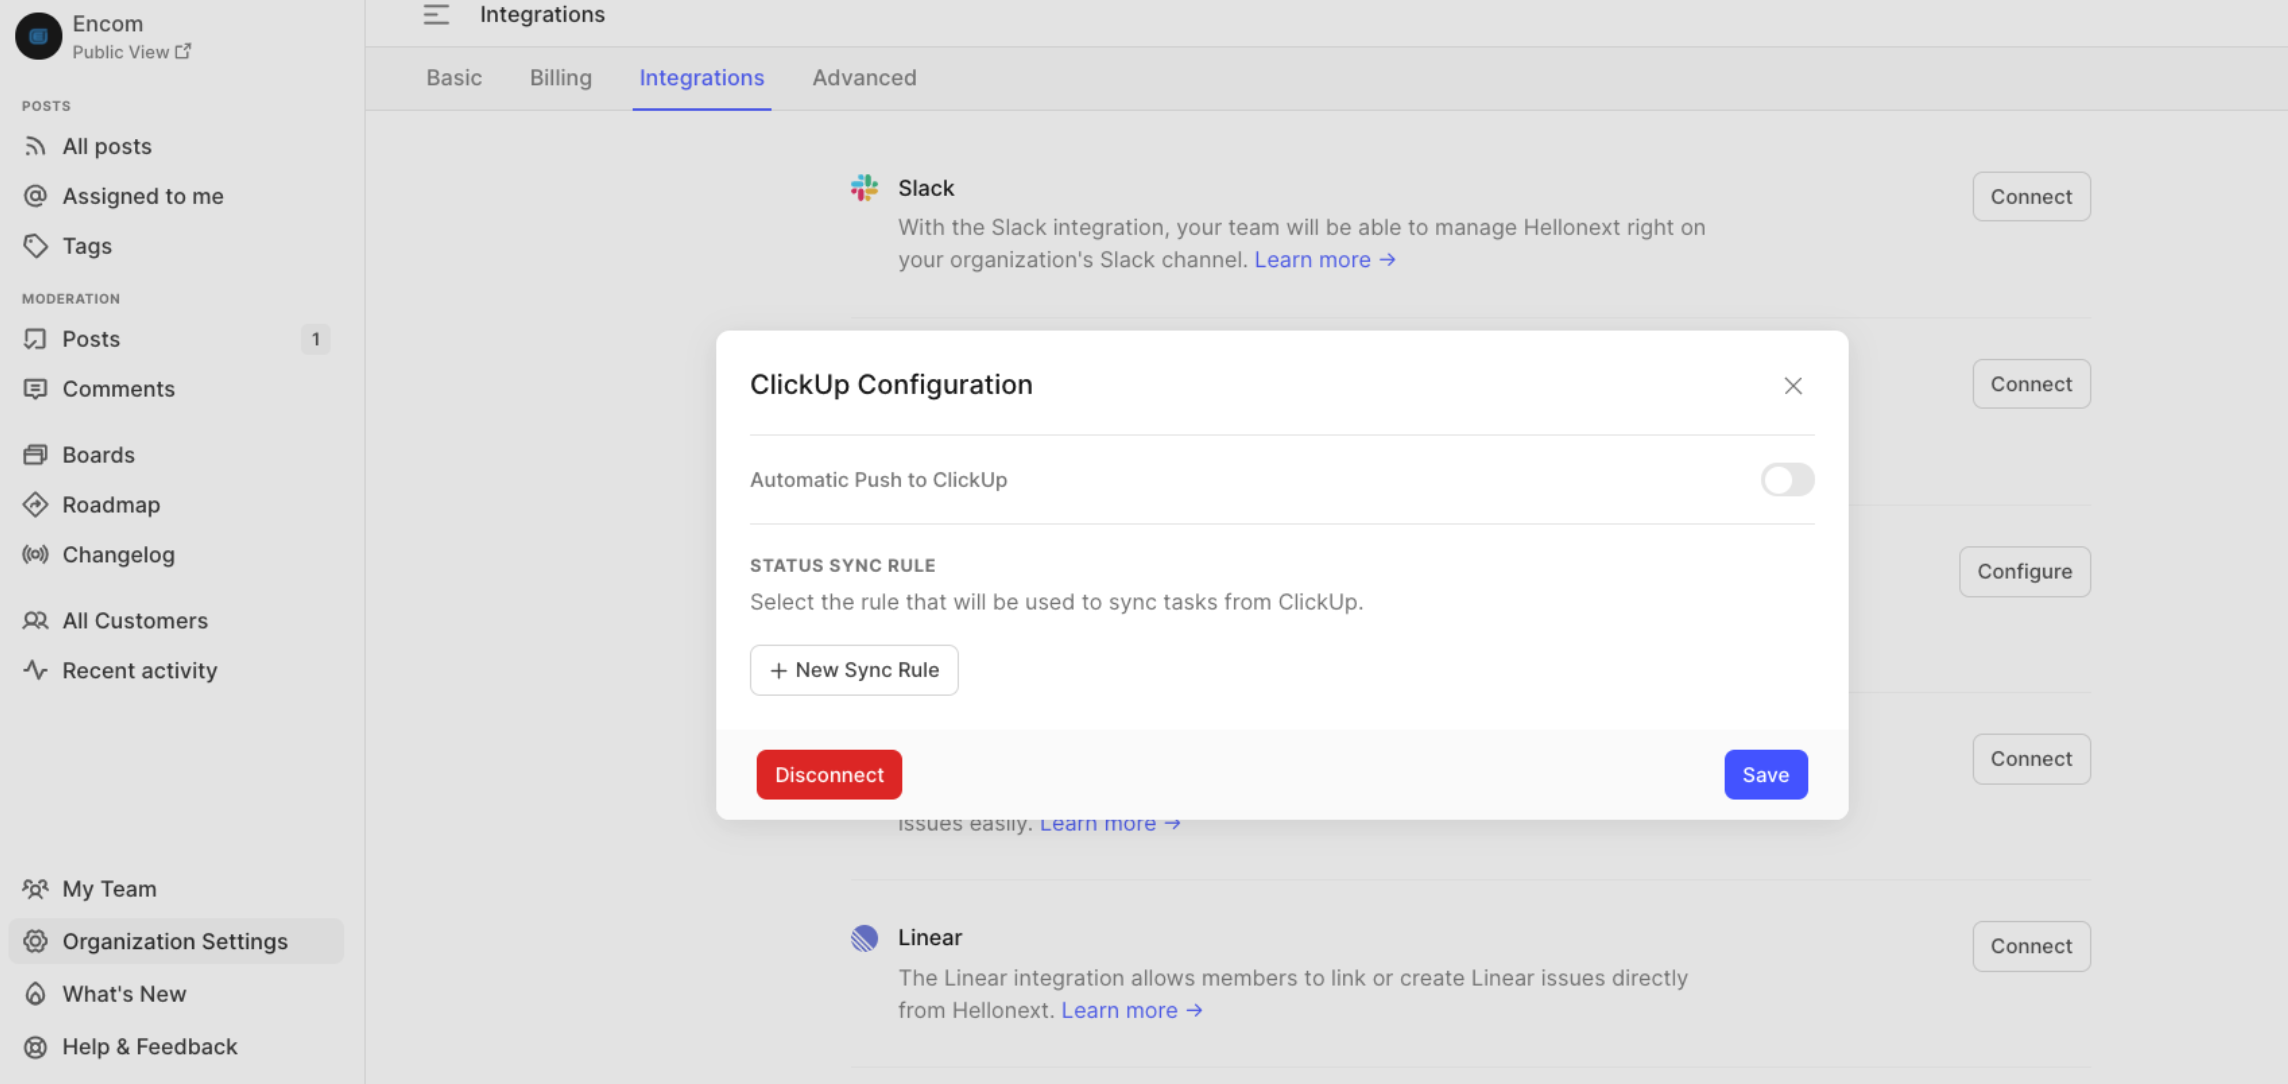
You can also find the details about which ClickUp workspace is connected to your respective Hellonext organization and the user profile used for this setup.
You can now proceed with setting up rules for this two-way sync as follows!
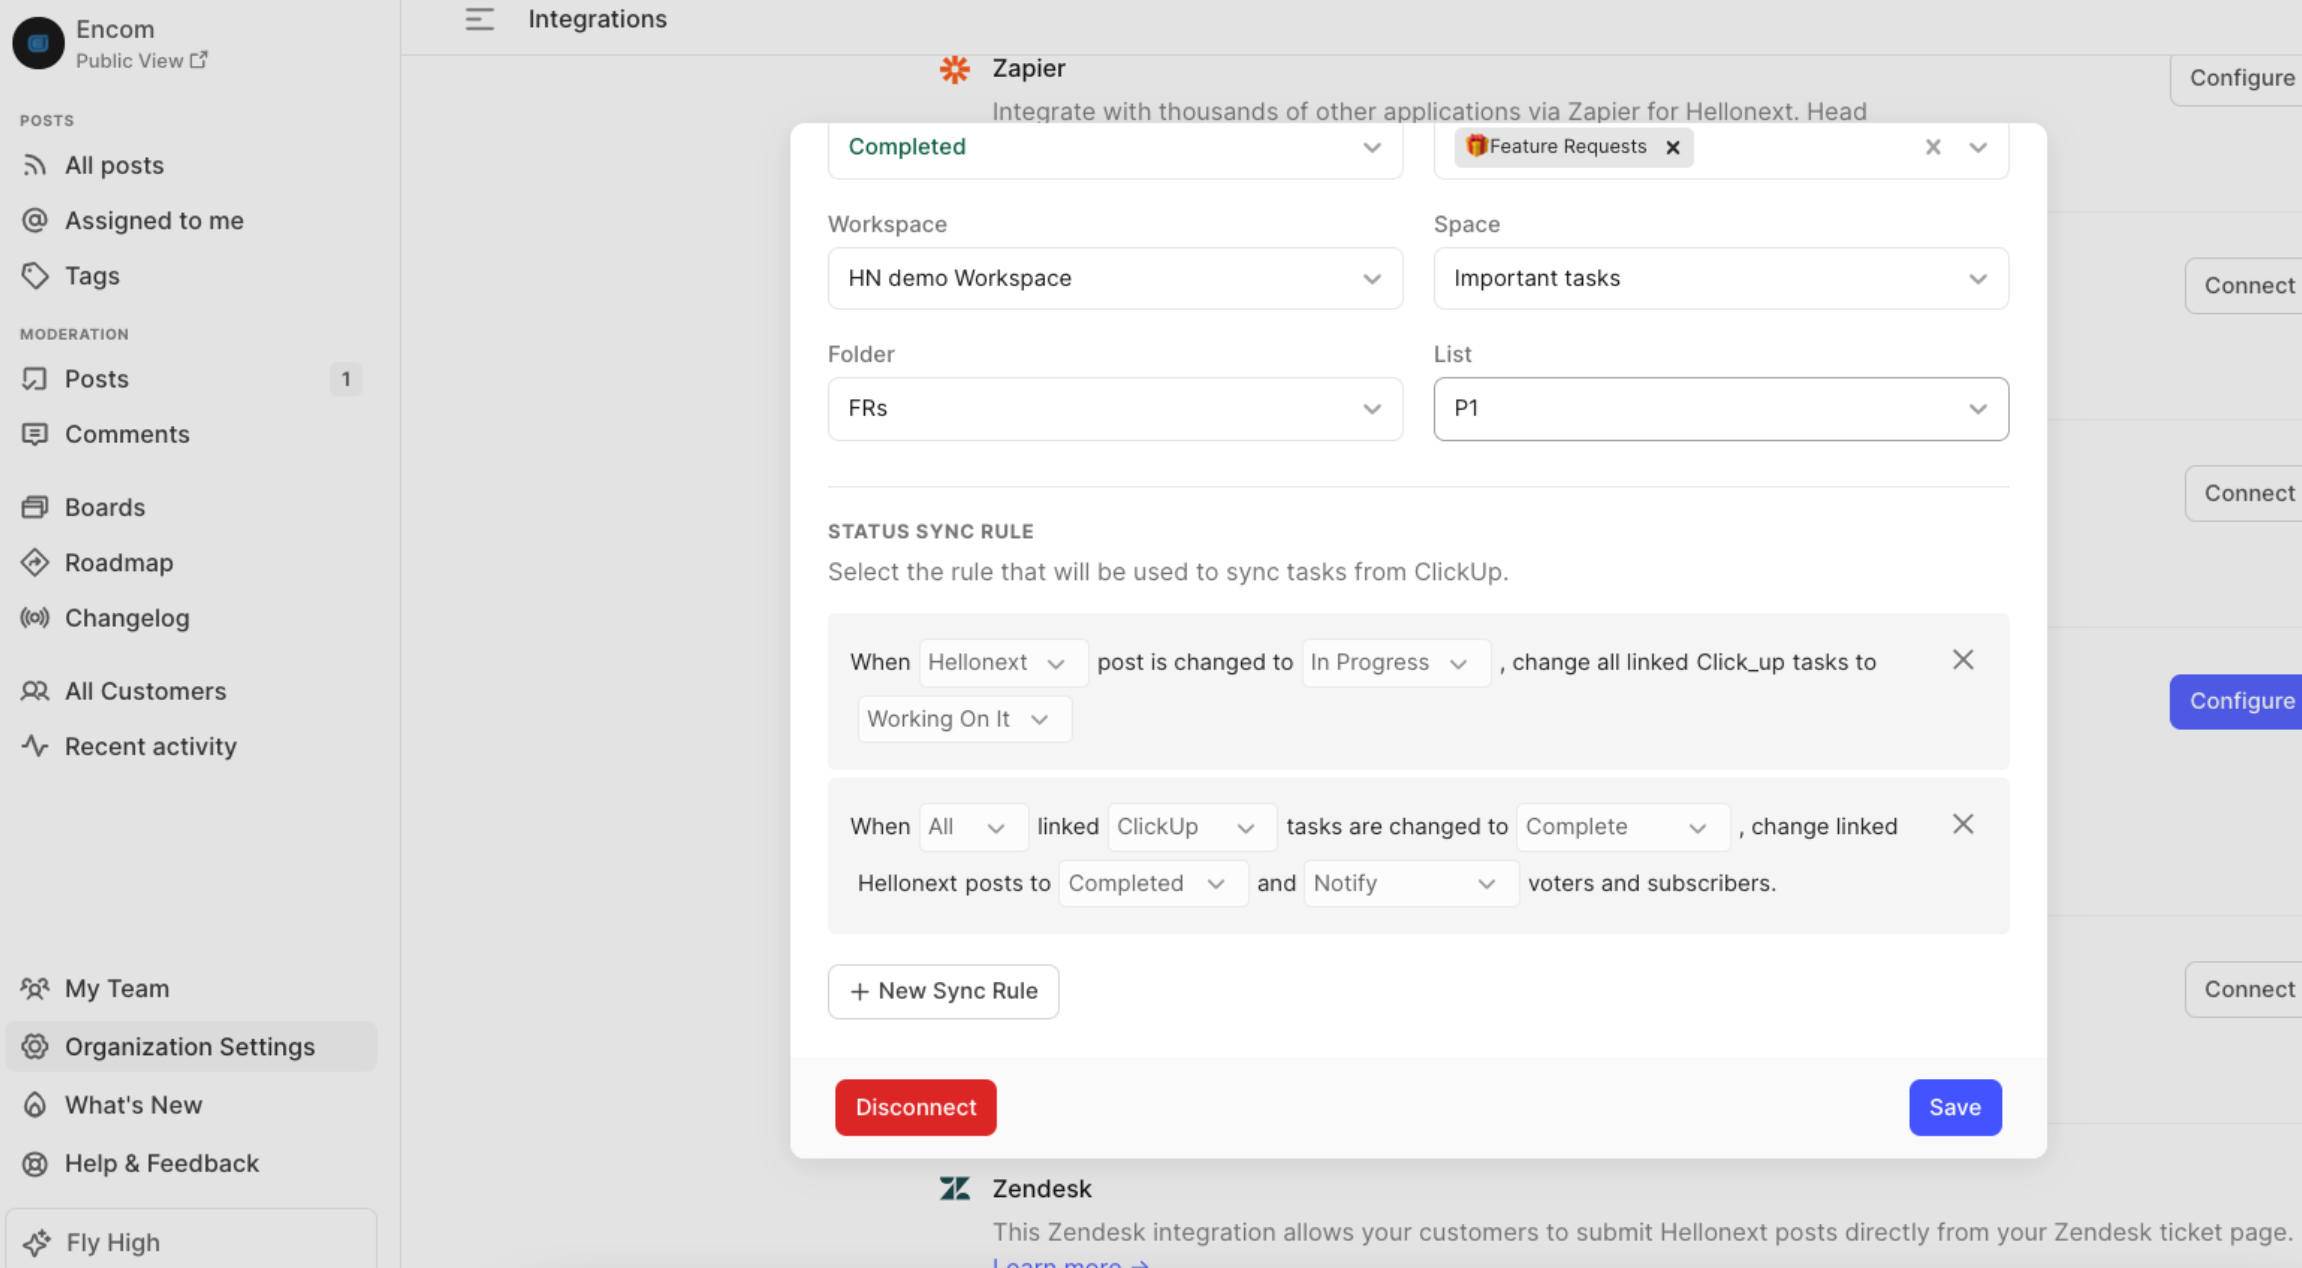
1. Enable Automatic Push to ClickUp
You can Enable Automatic Push to ClickUp to push Hellonext posts to ClickUp automatically, upon a particular status change on Hellonext posts. You can also choose the relevant Workspace, Space, Folder and List on ClickUp that this task push must be made to.
-
The initial rule you set for “Automatic Push to ClickUp” is when you change the status of the posts to one of the available statuses in the dropdown, the respective posts will be pushed to ClickUp.
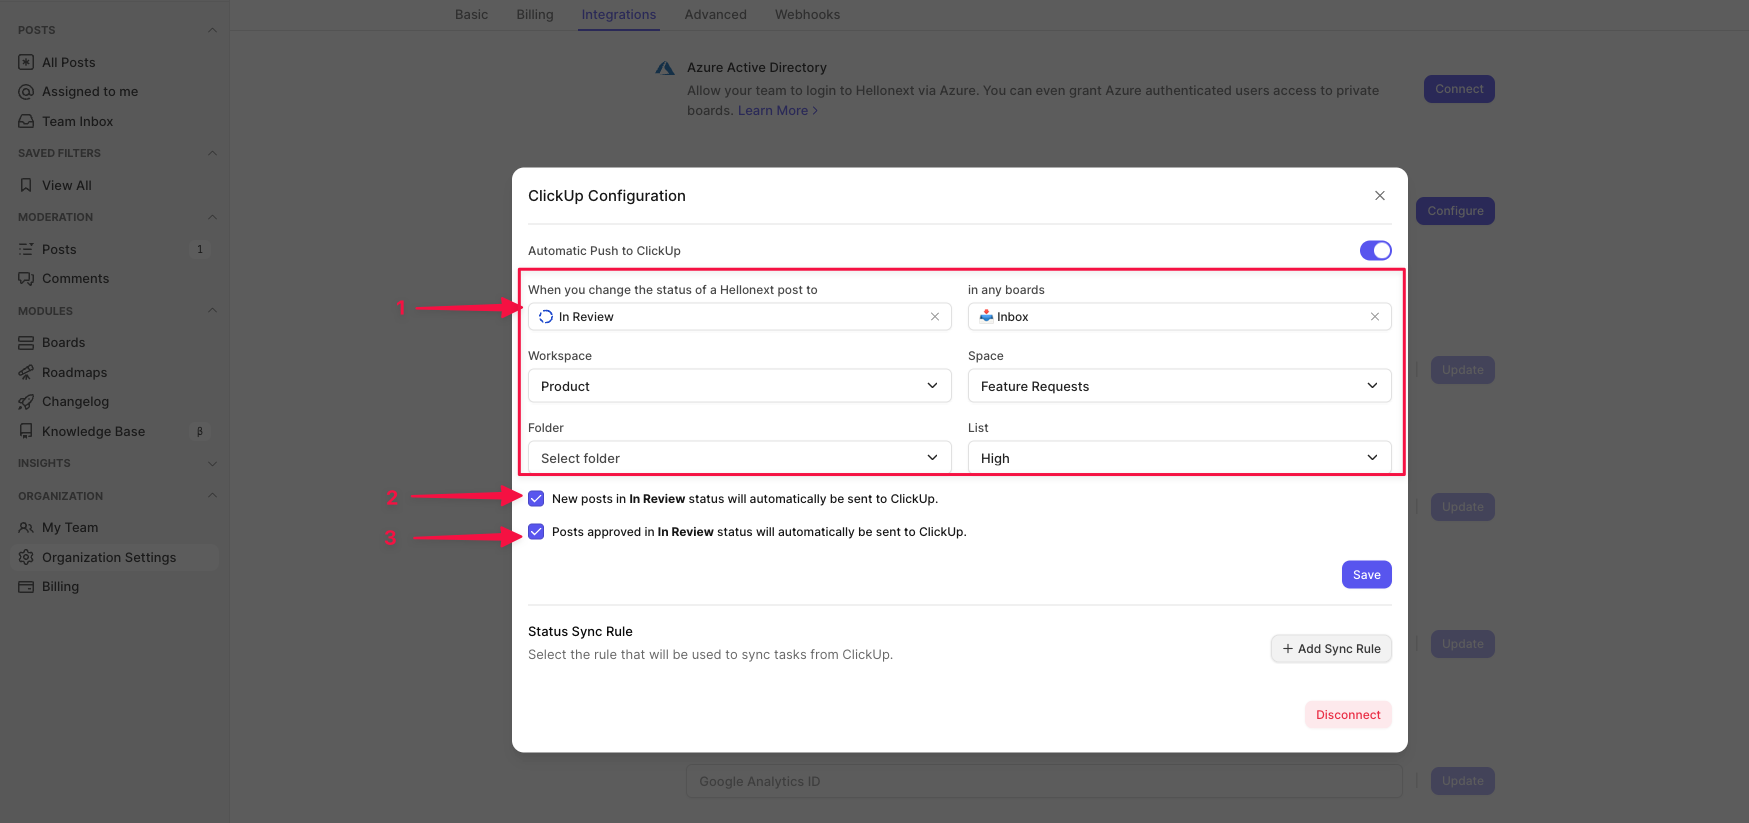
Push posts immediately after submitting - To automatically push posts to ClickUp as soon as they are created on Hellonext - you must enable the check box “New posts in In Review status will automatically be sent to ClickUp.”
Post moderation enabled - To automatically push posts to ClickUp as soon as they are approved in moderation, on Hellonext - you must enable the check box “Posts approved in In Review status will automatically be sent to ClickUp.”
2. Set status sync rules
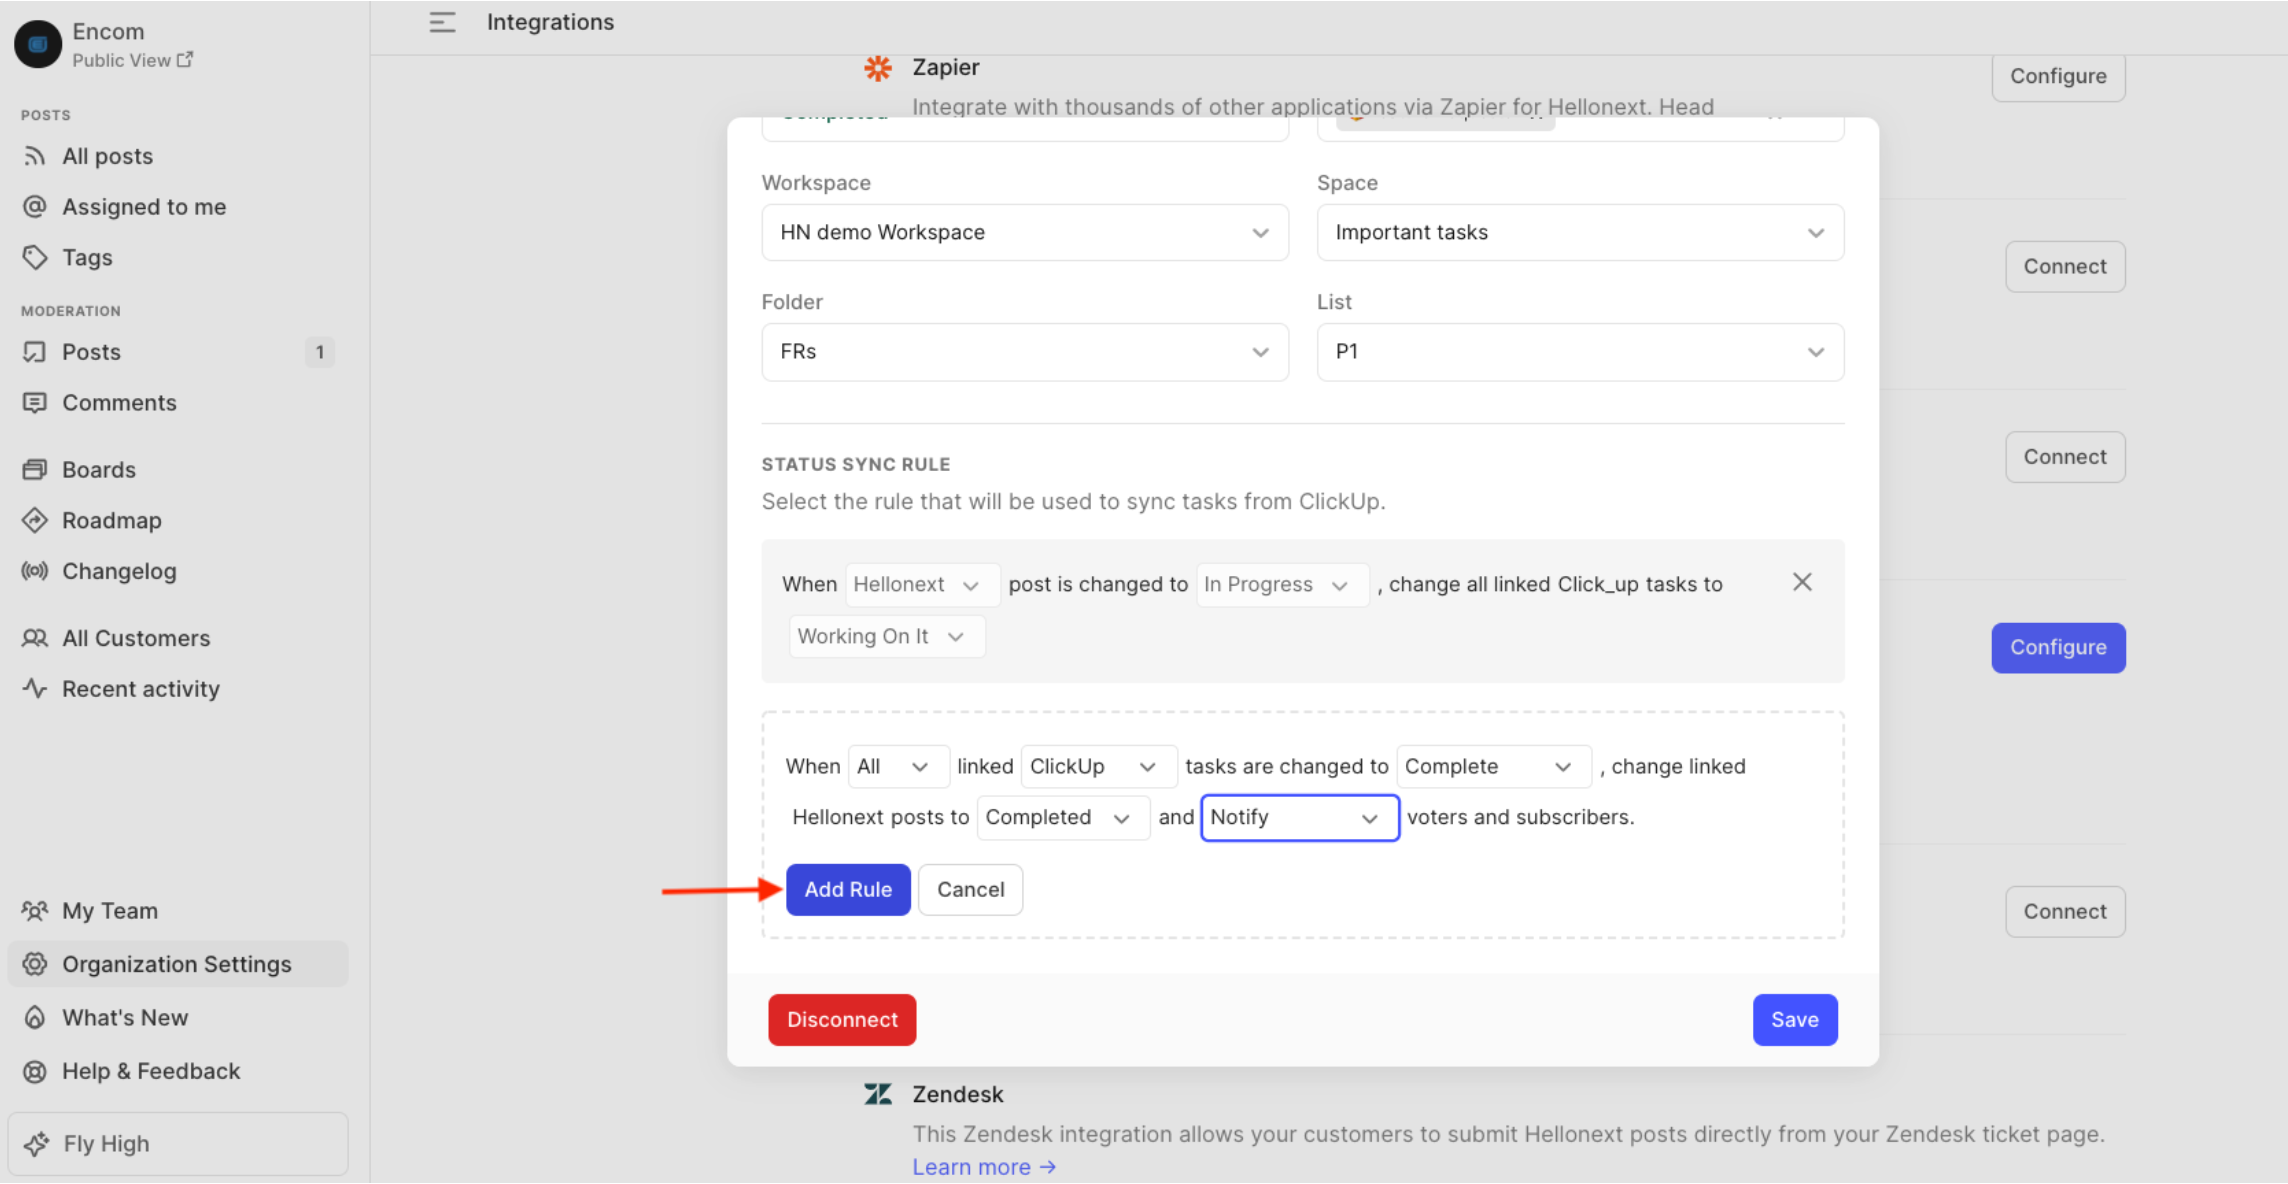
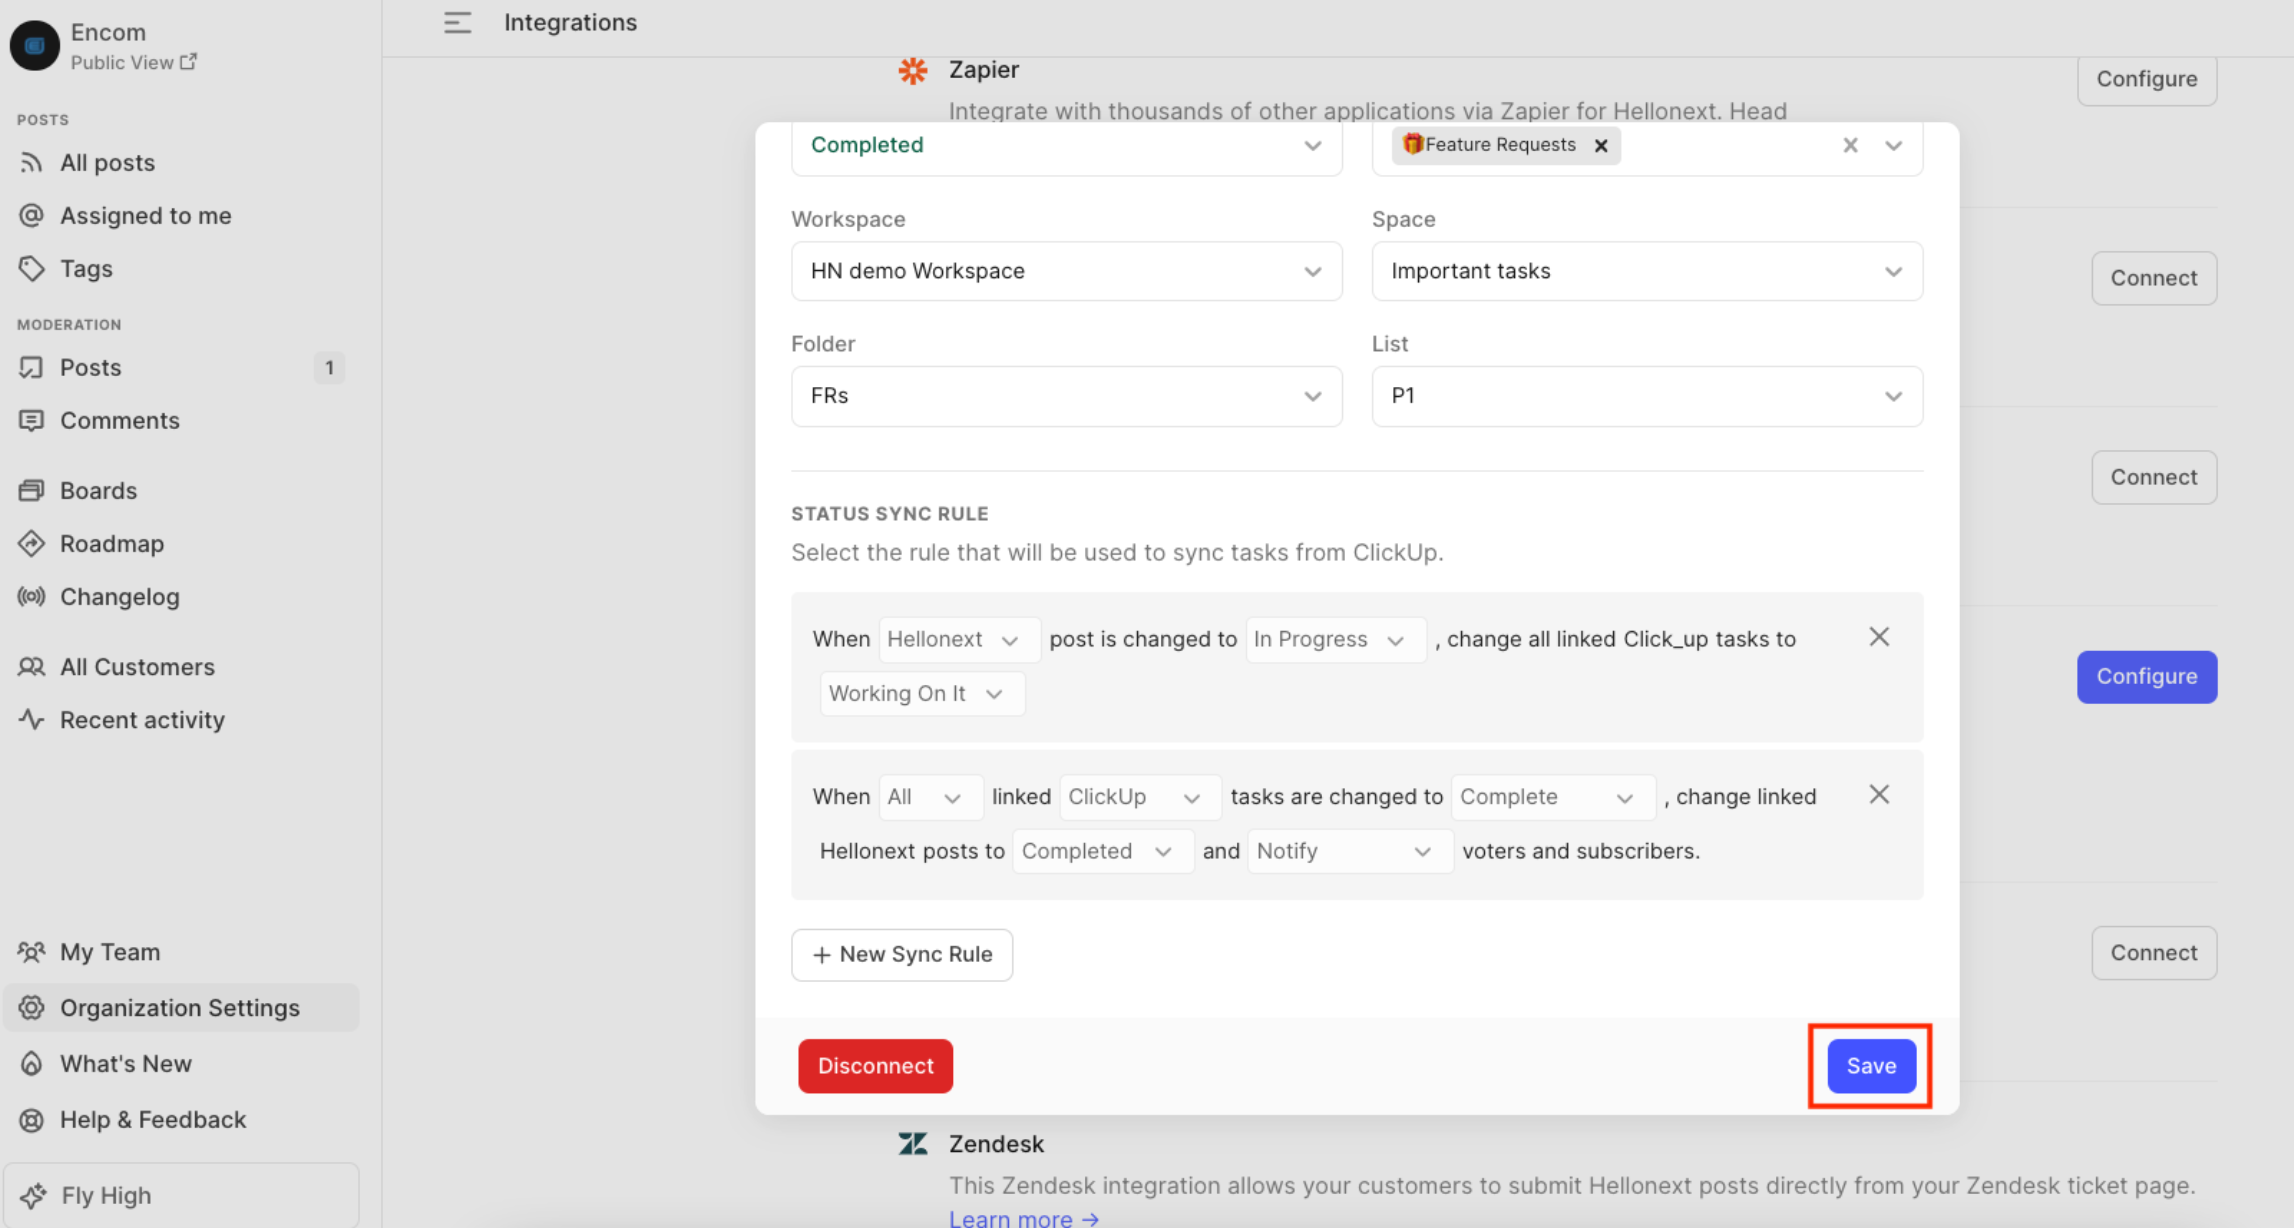
You can now set Sync rules that will be used to sync tasks from and onto ClickUp. You can click on the + New Sync Rule button to start adding rules! There are 3 types of Sync rules you can set:
When Any linked ClickUp task is changed to a set Status, change linked Hellonext posts to the set Status and Notify / Do not Notify voters and subscribers.
When All linked ClickUp tasks are changed to a set Status, change linked Hellonext posts to the set Status and Notify / Do not Notify voters and subscribers.
When a Hellonext post is changed to a set Status, change all linked ClickUp tasks to the set Status.
-
Click on the Add Rule button to save the set rule.
-
Click on Save to save the Sync configuration.
How does the Integration setup work?
Once the Integration setup is complete, you will see a Push to ClickUp button within all your posts on Hellonext, on the right panel. Clicking on Push to ClickUp will give you two options:
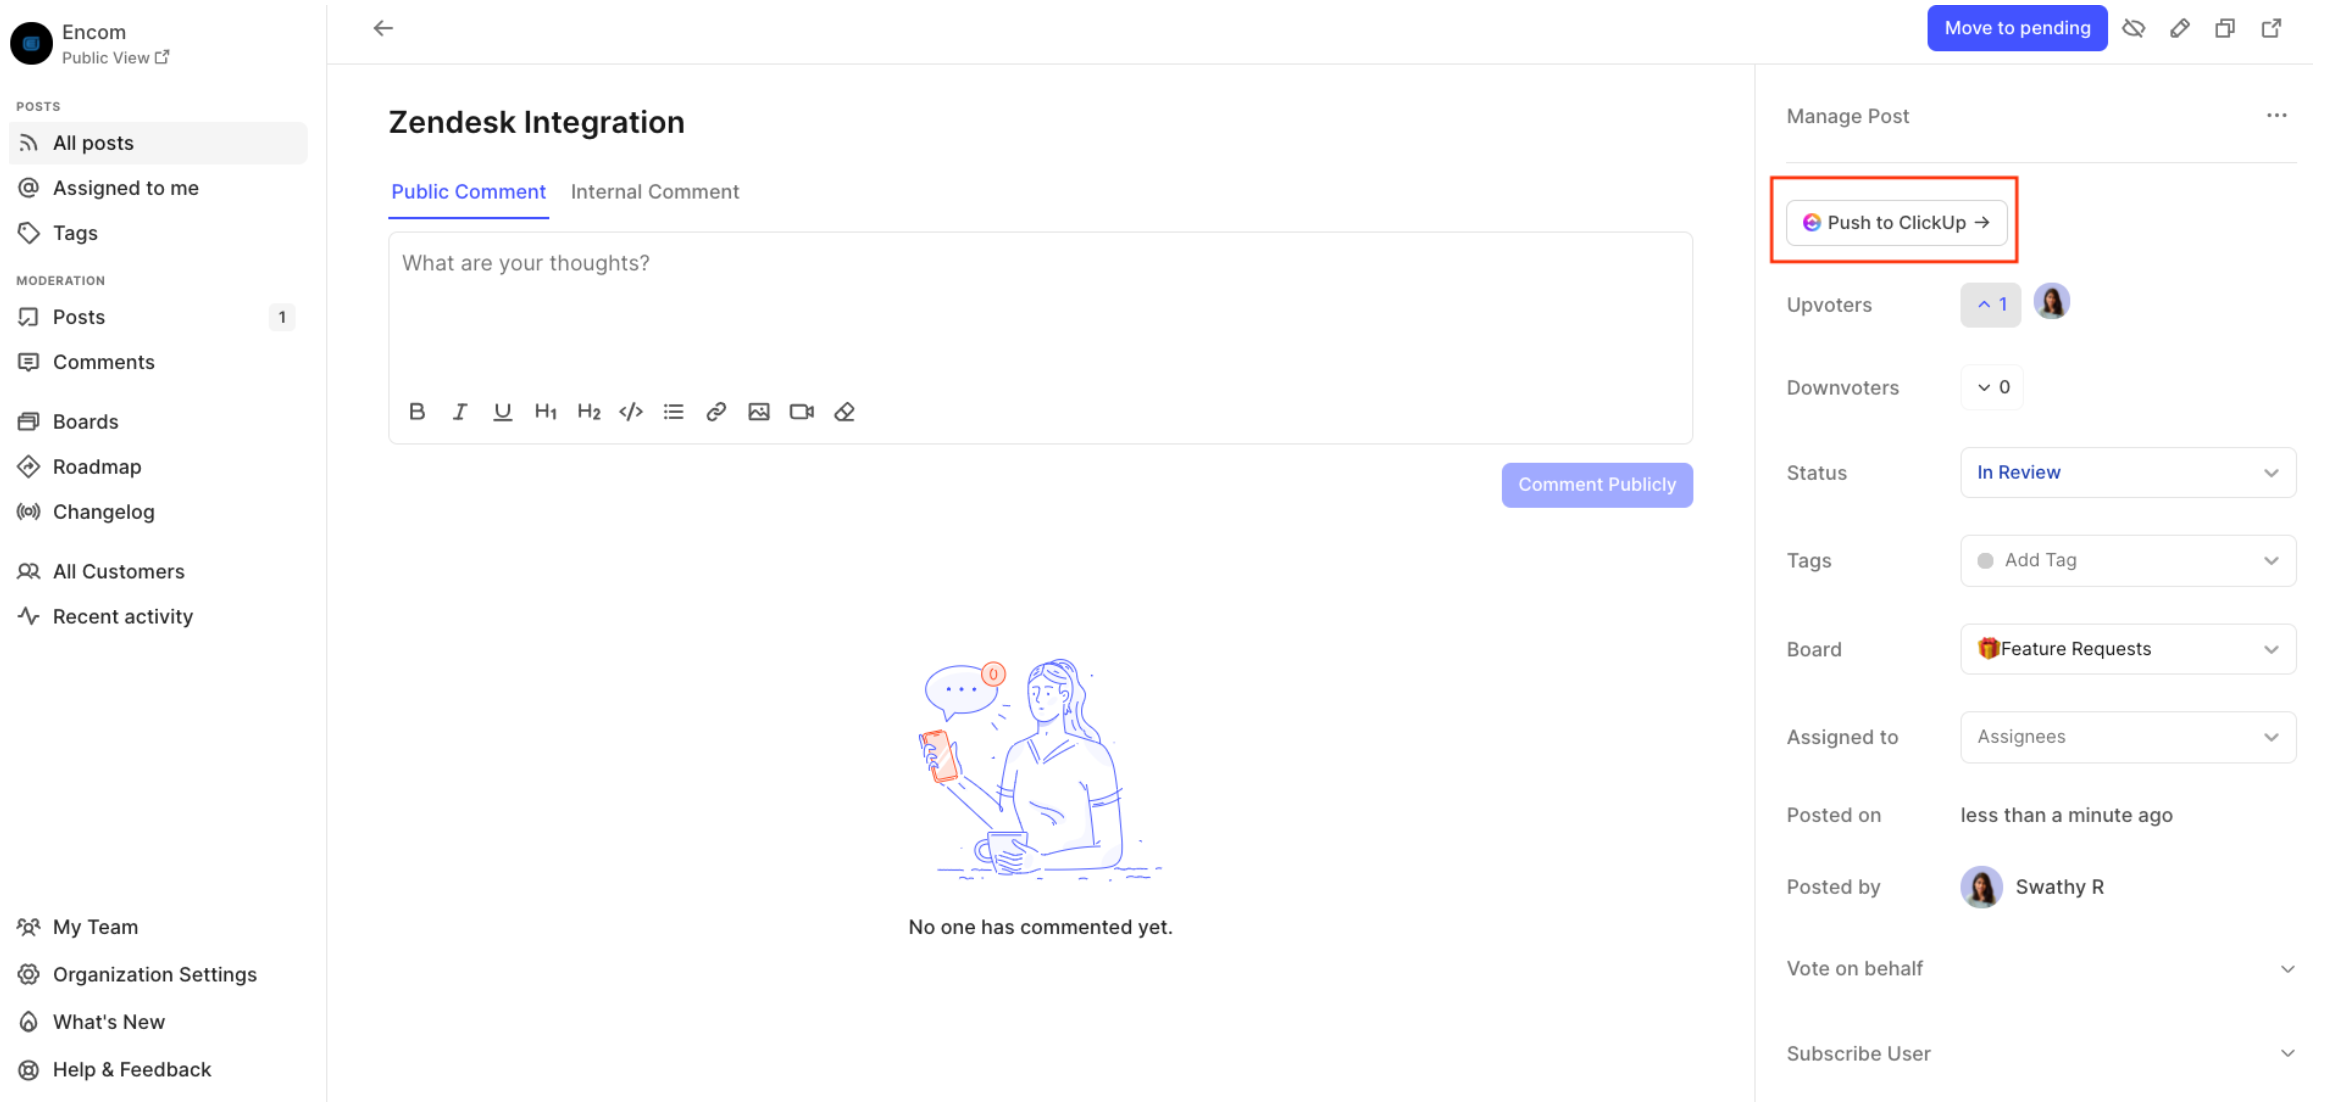
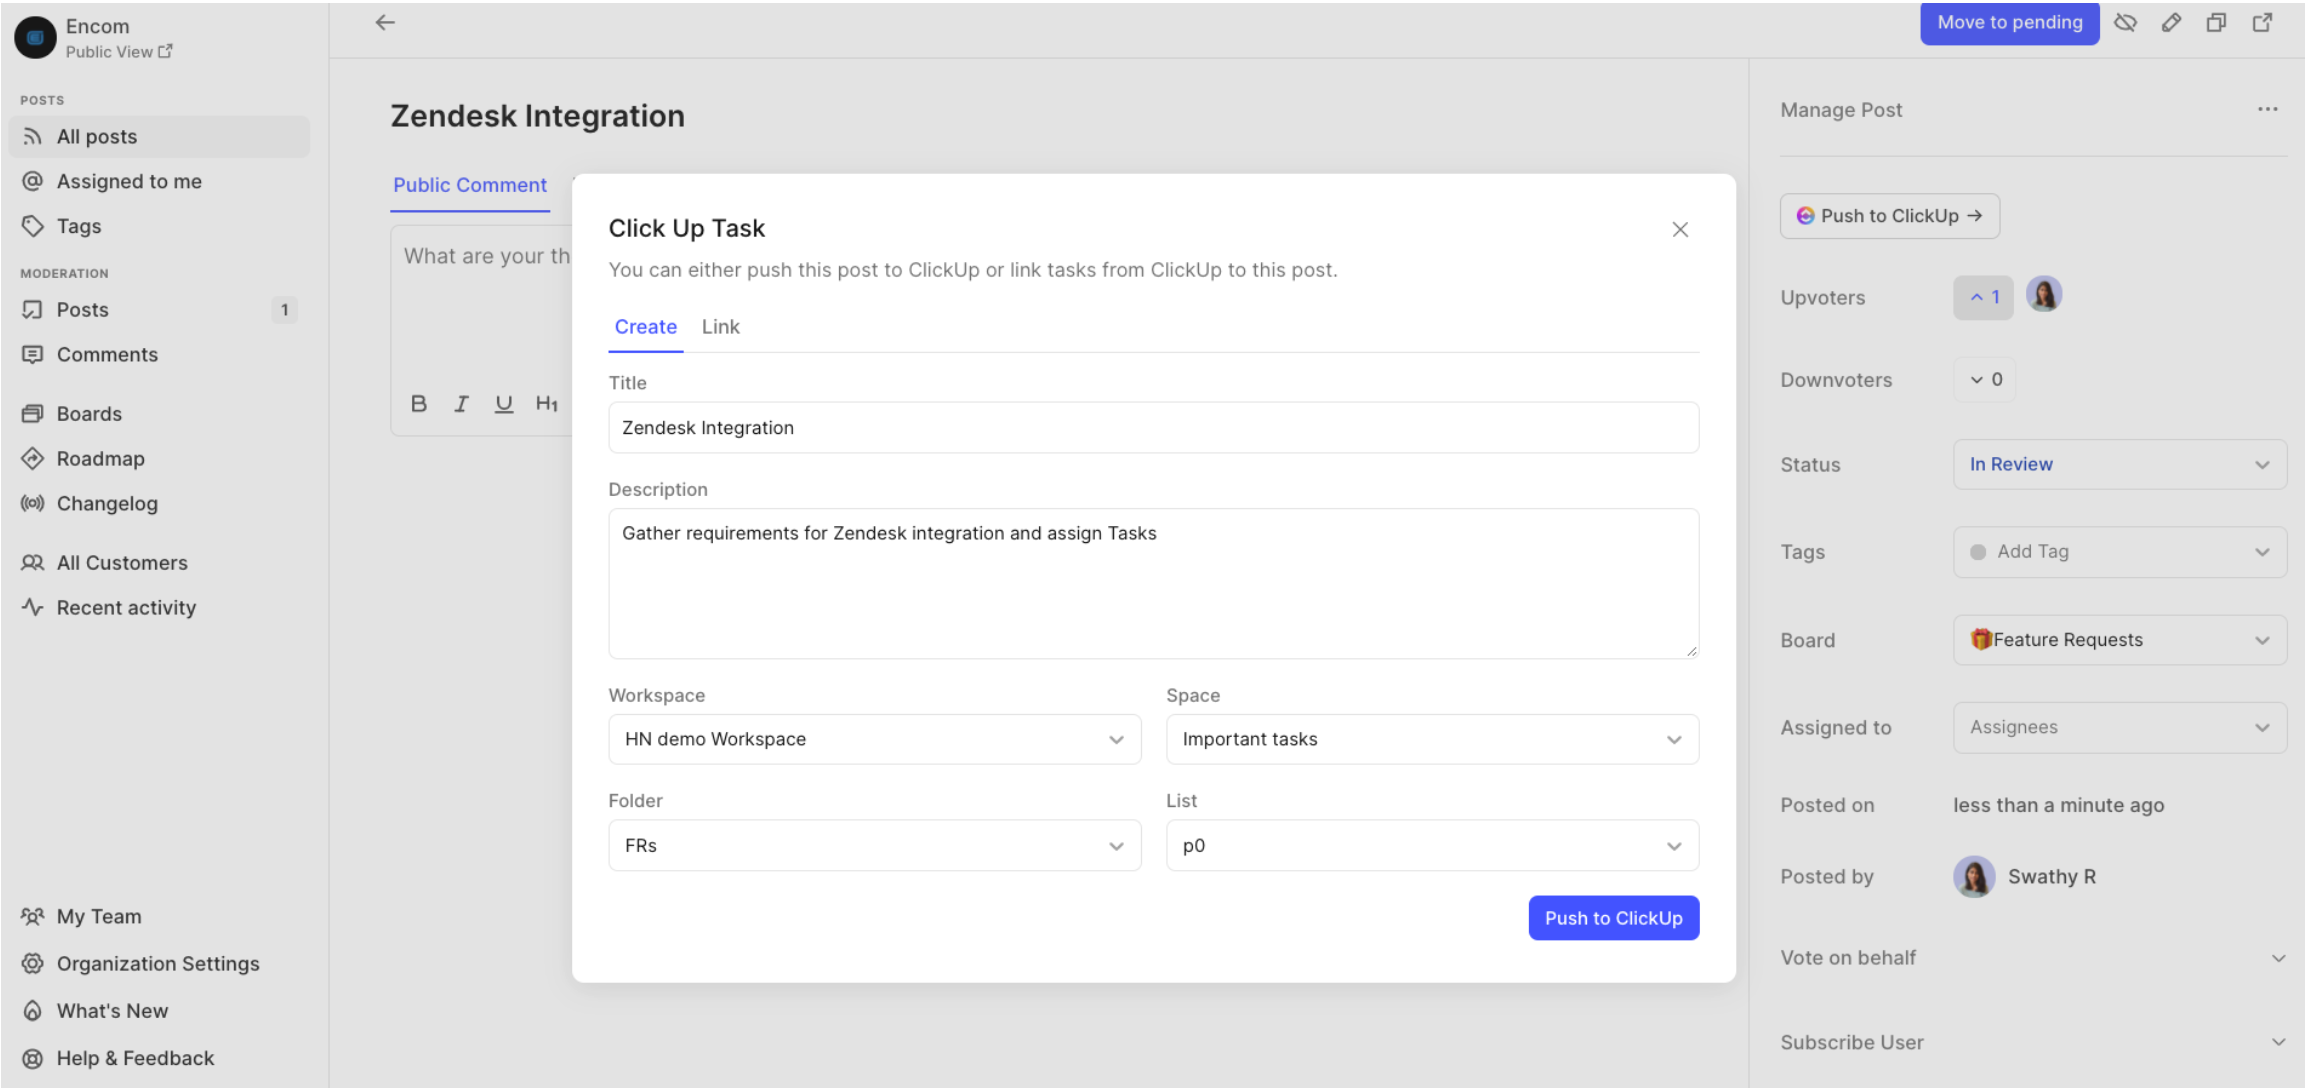
1. Create a ClickUp task:
Please note that only one ClickUp task can be created from a Hellonext post.
In the Create tab, you can modify the Title and Description of the issue, You can also choose the relevant Workspace, Space, Folder and List on ClickUp that this task push must be made to.
-
Click on Push to ClickUp once done.
-
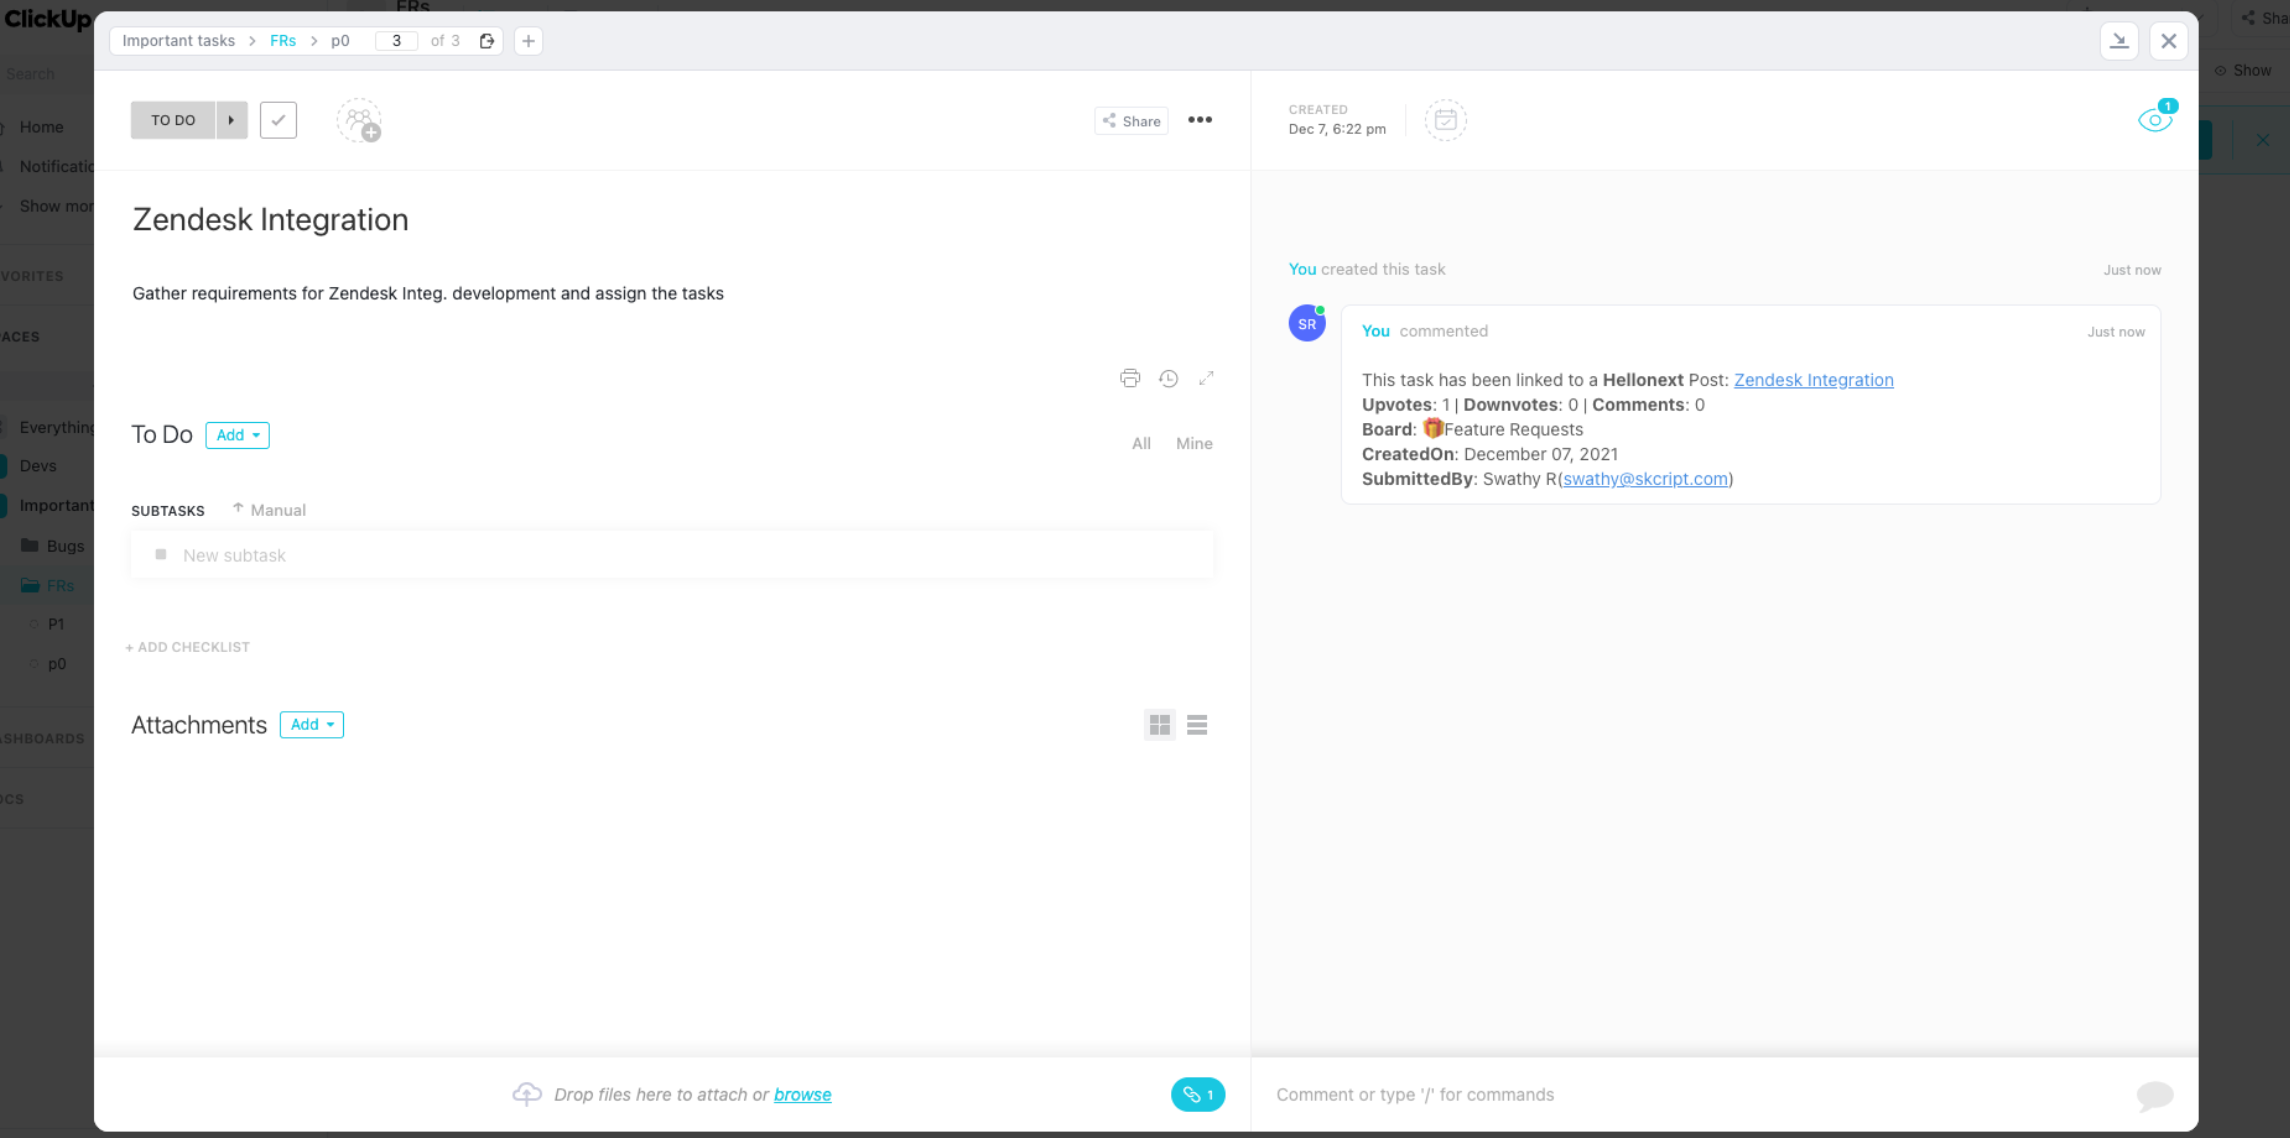
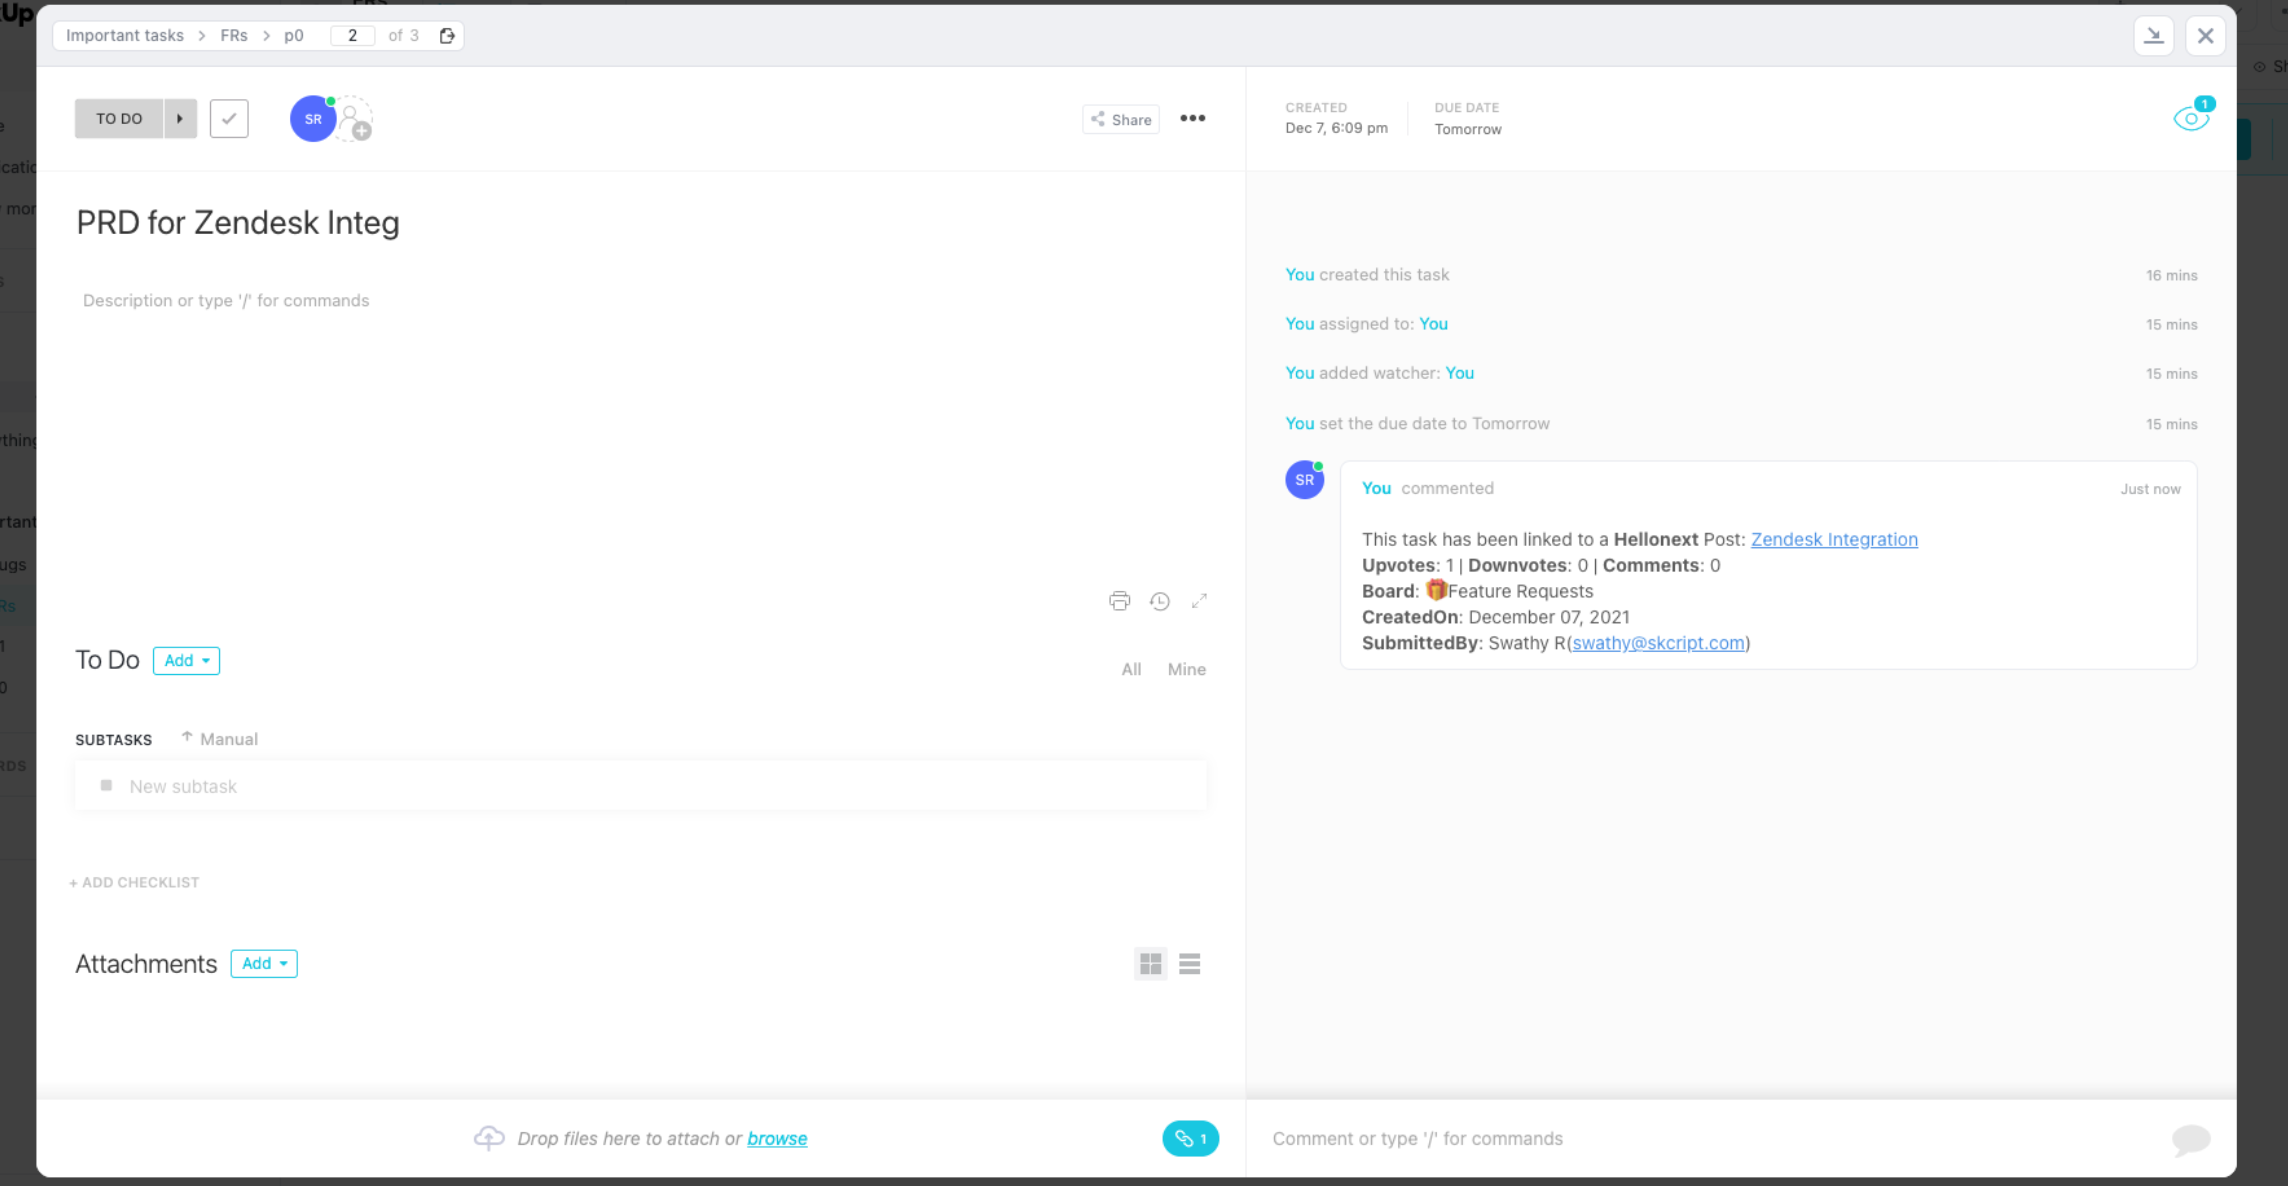
The ClickUp task created from a Hellonext post will contain the post details in its comment, as shown in the screenshot.
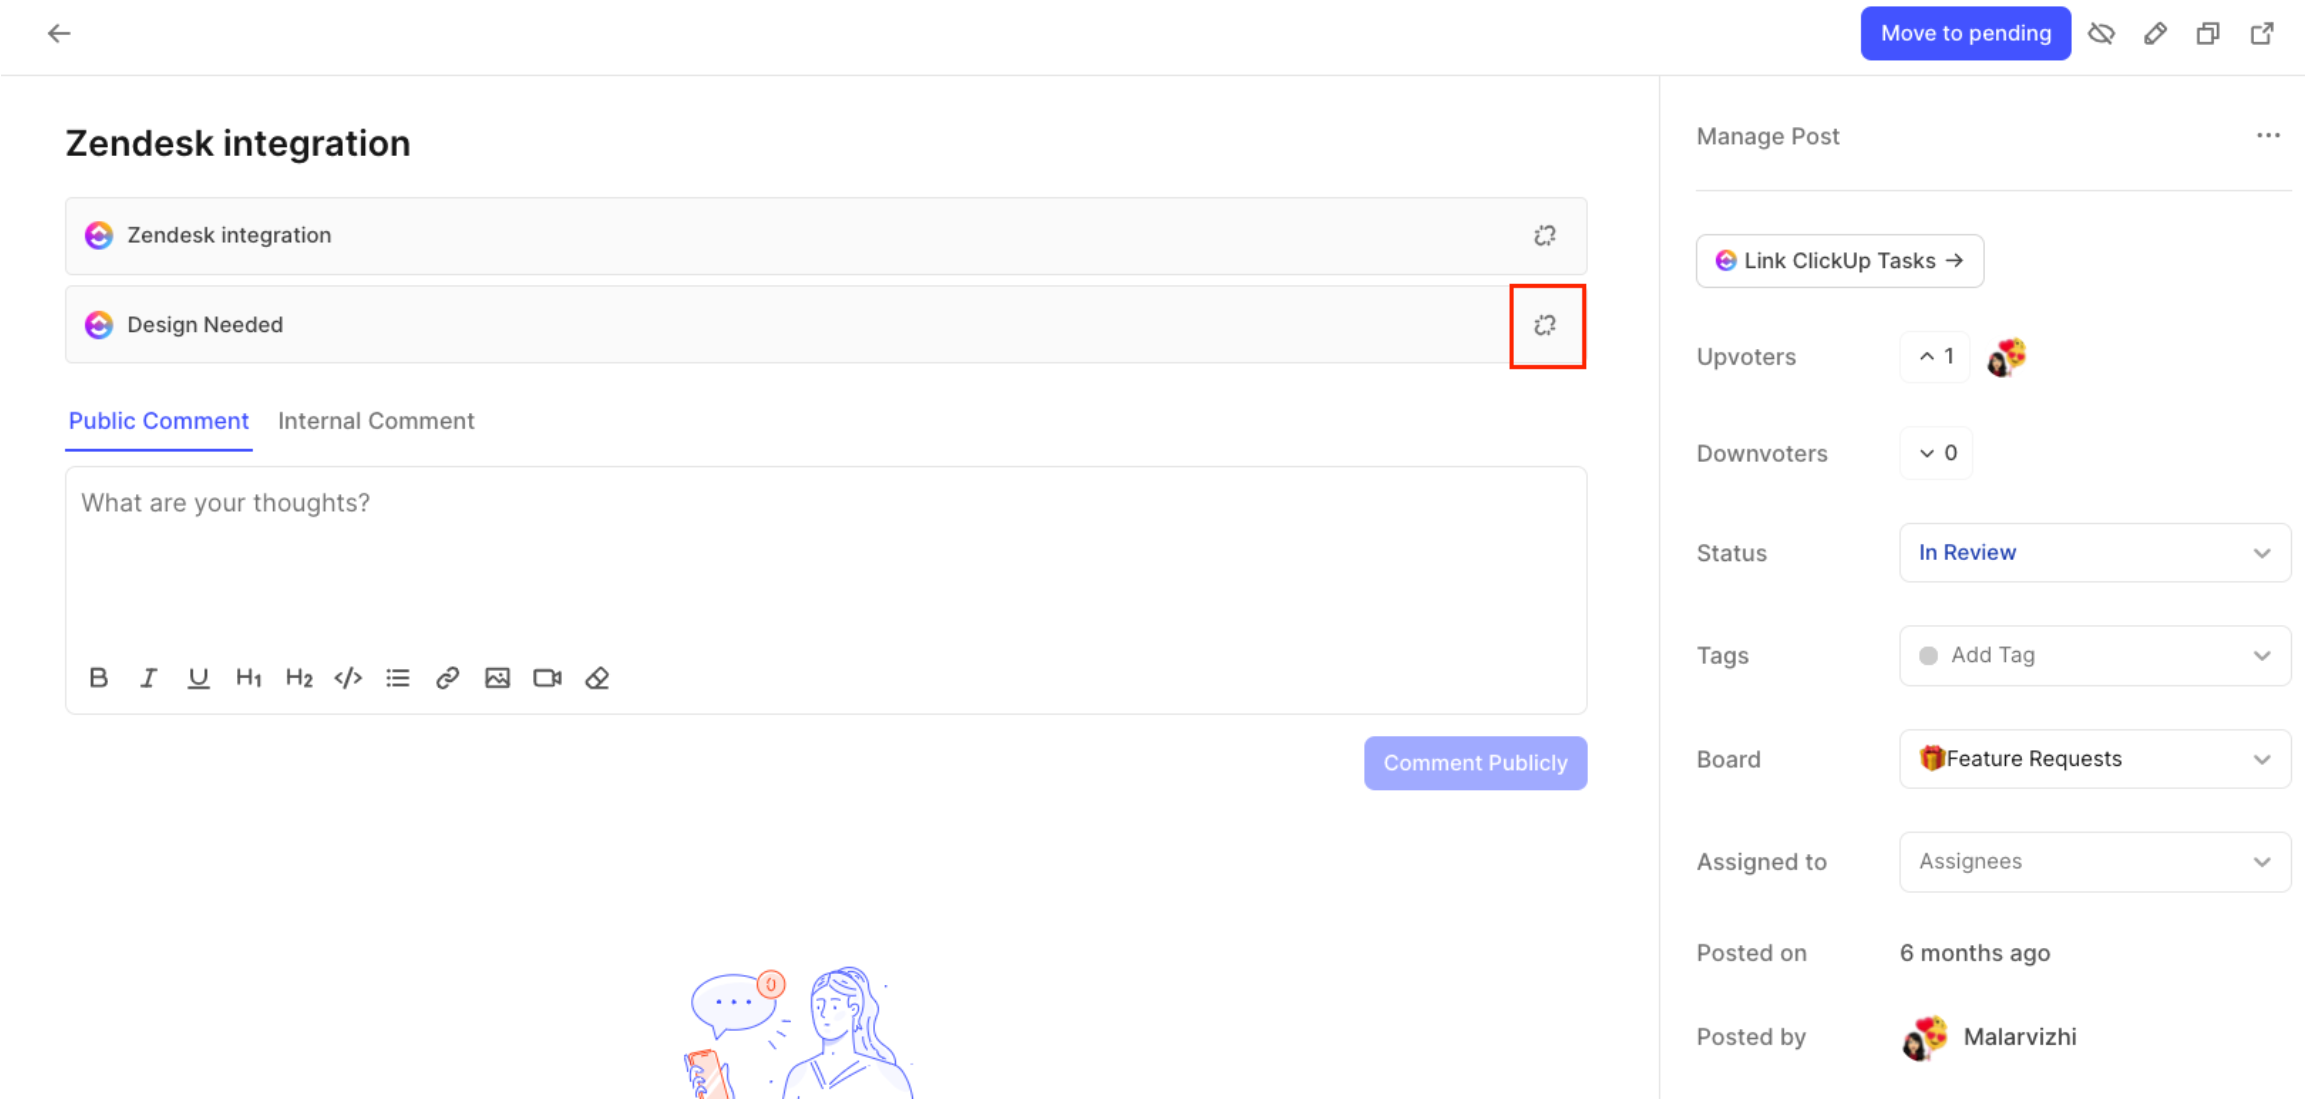
2. Link ClickUp Tasks:
You can link multiple ClickUp tasks to a single Hellonext post.
Toggle to the Link tab and search for ClickUp tasks to link using the task ID. Here's how you can locate it!
-
Click on the Link button to link a ClickUp task to the Hellonext post, from the search result.
-
Once linked, the ClickUp task will also contain a link to the Hellonext post.
3. Status Updates:
The status updates that happen on Hellonext and ClickUp are based on the sync rules that you configured!
A quick walk through the video, which you'll find at the end of this article, will give you a brief on how this works! ✌🏼
4. Unlink a ClickUp task from a Hellonext post:
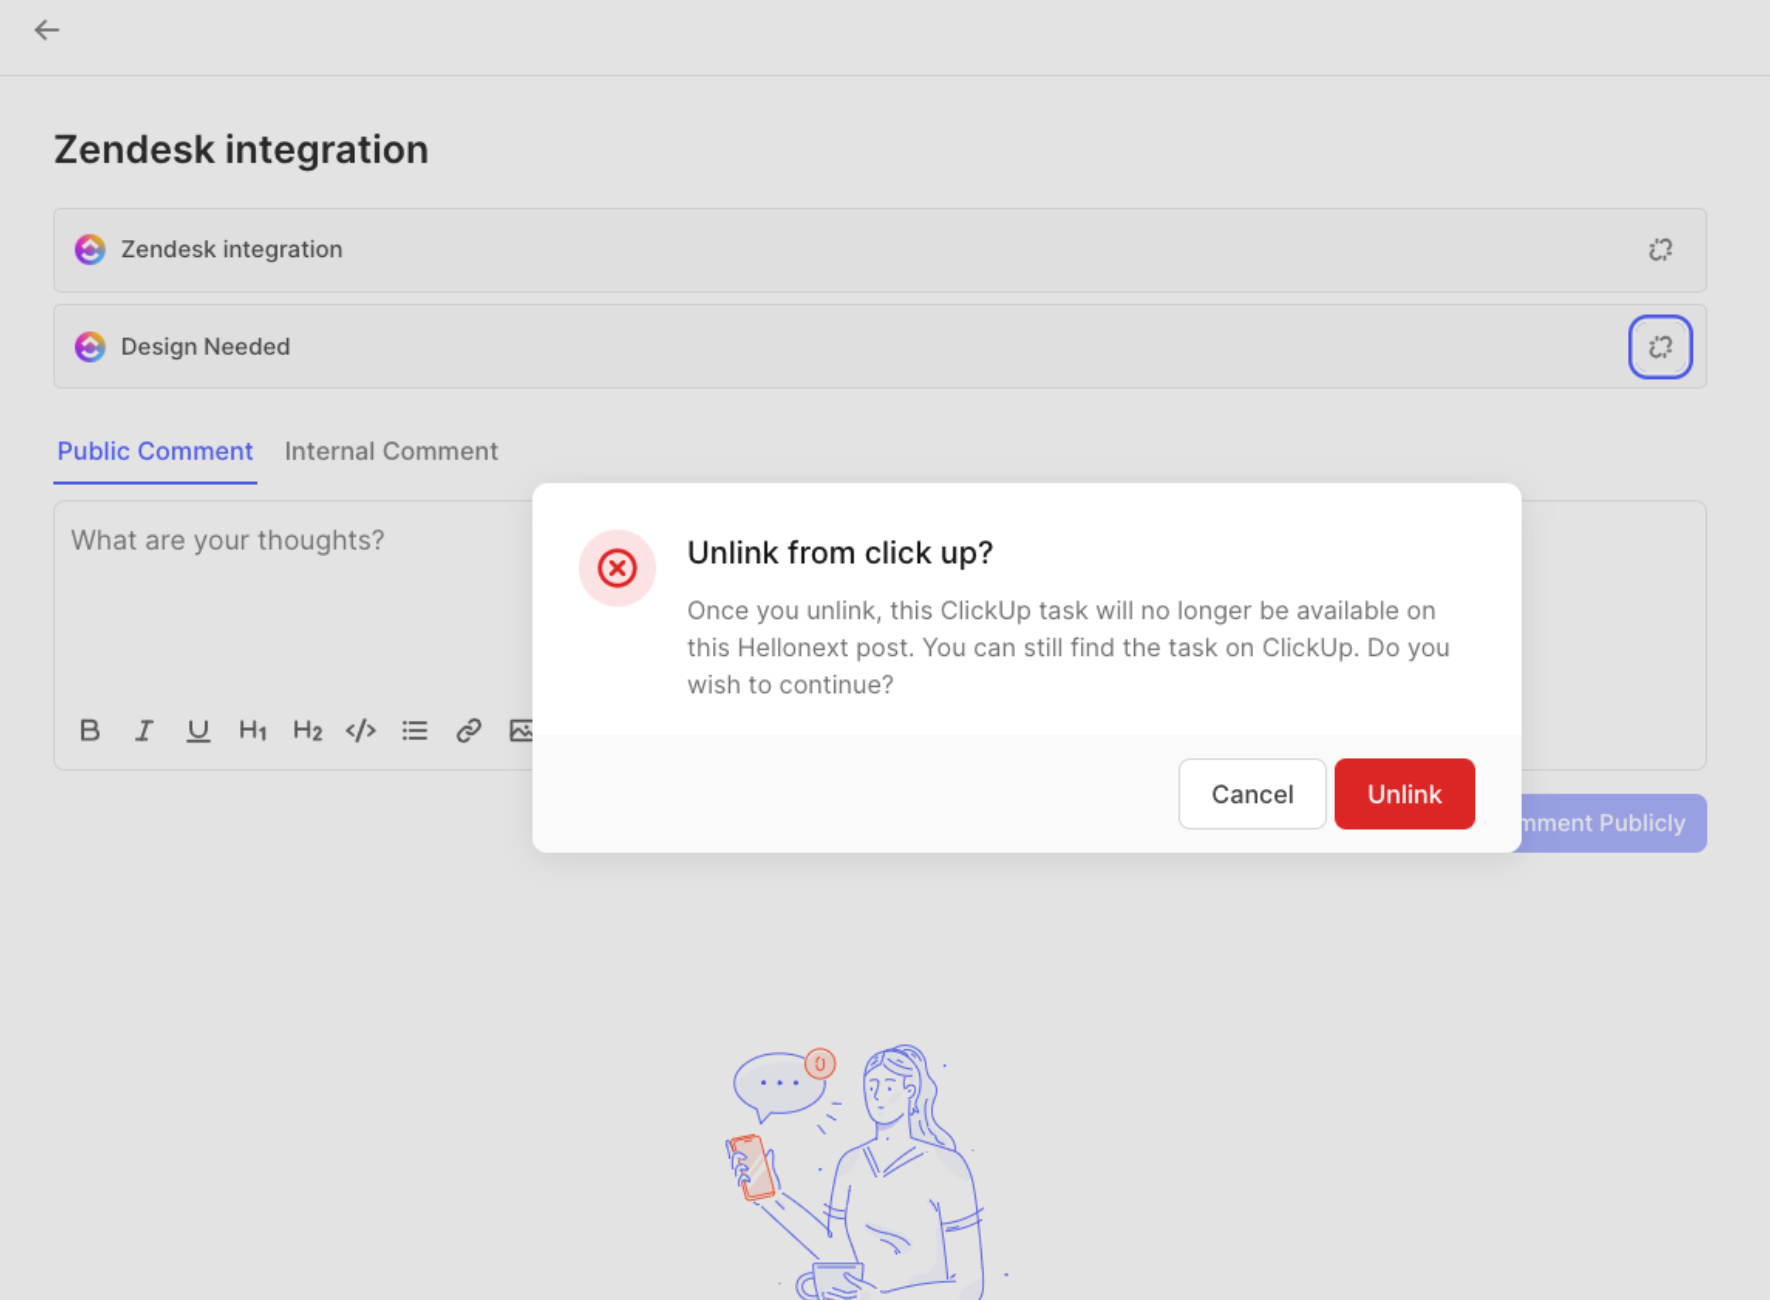
You can unlink a ClickUp task from a Hellonext post simple click on the Unlink icon that appear at the right corner of the linked tasks.
Please note that once you Unlink, the respective ClickUp task will no longer be available on that Hellonext post. You can still find the task on ClickUp. Click on Unlink to finalize.
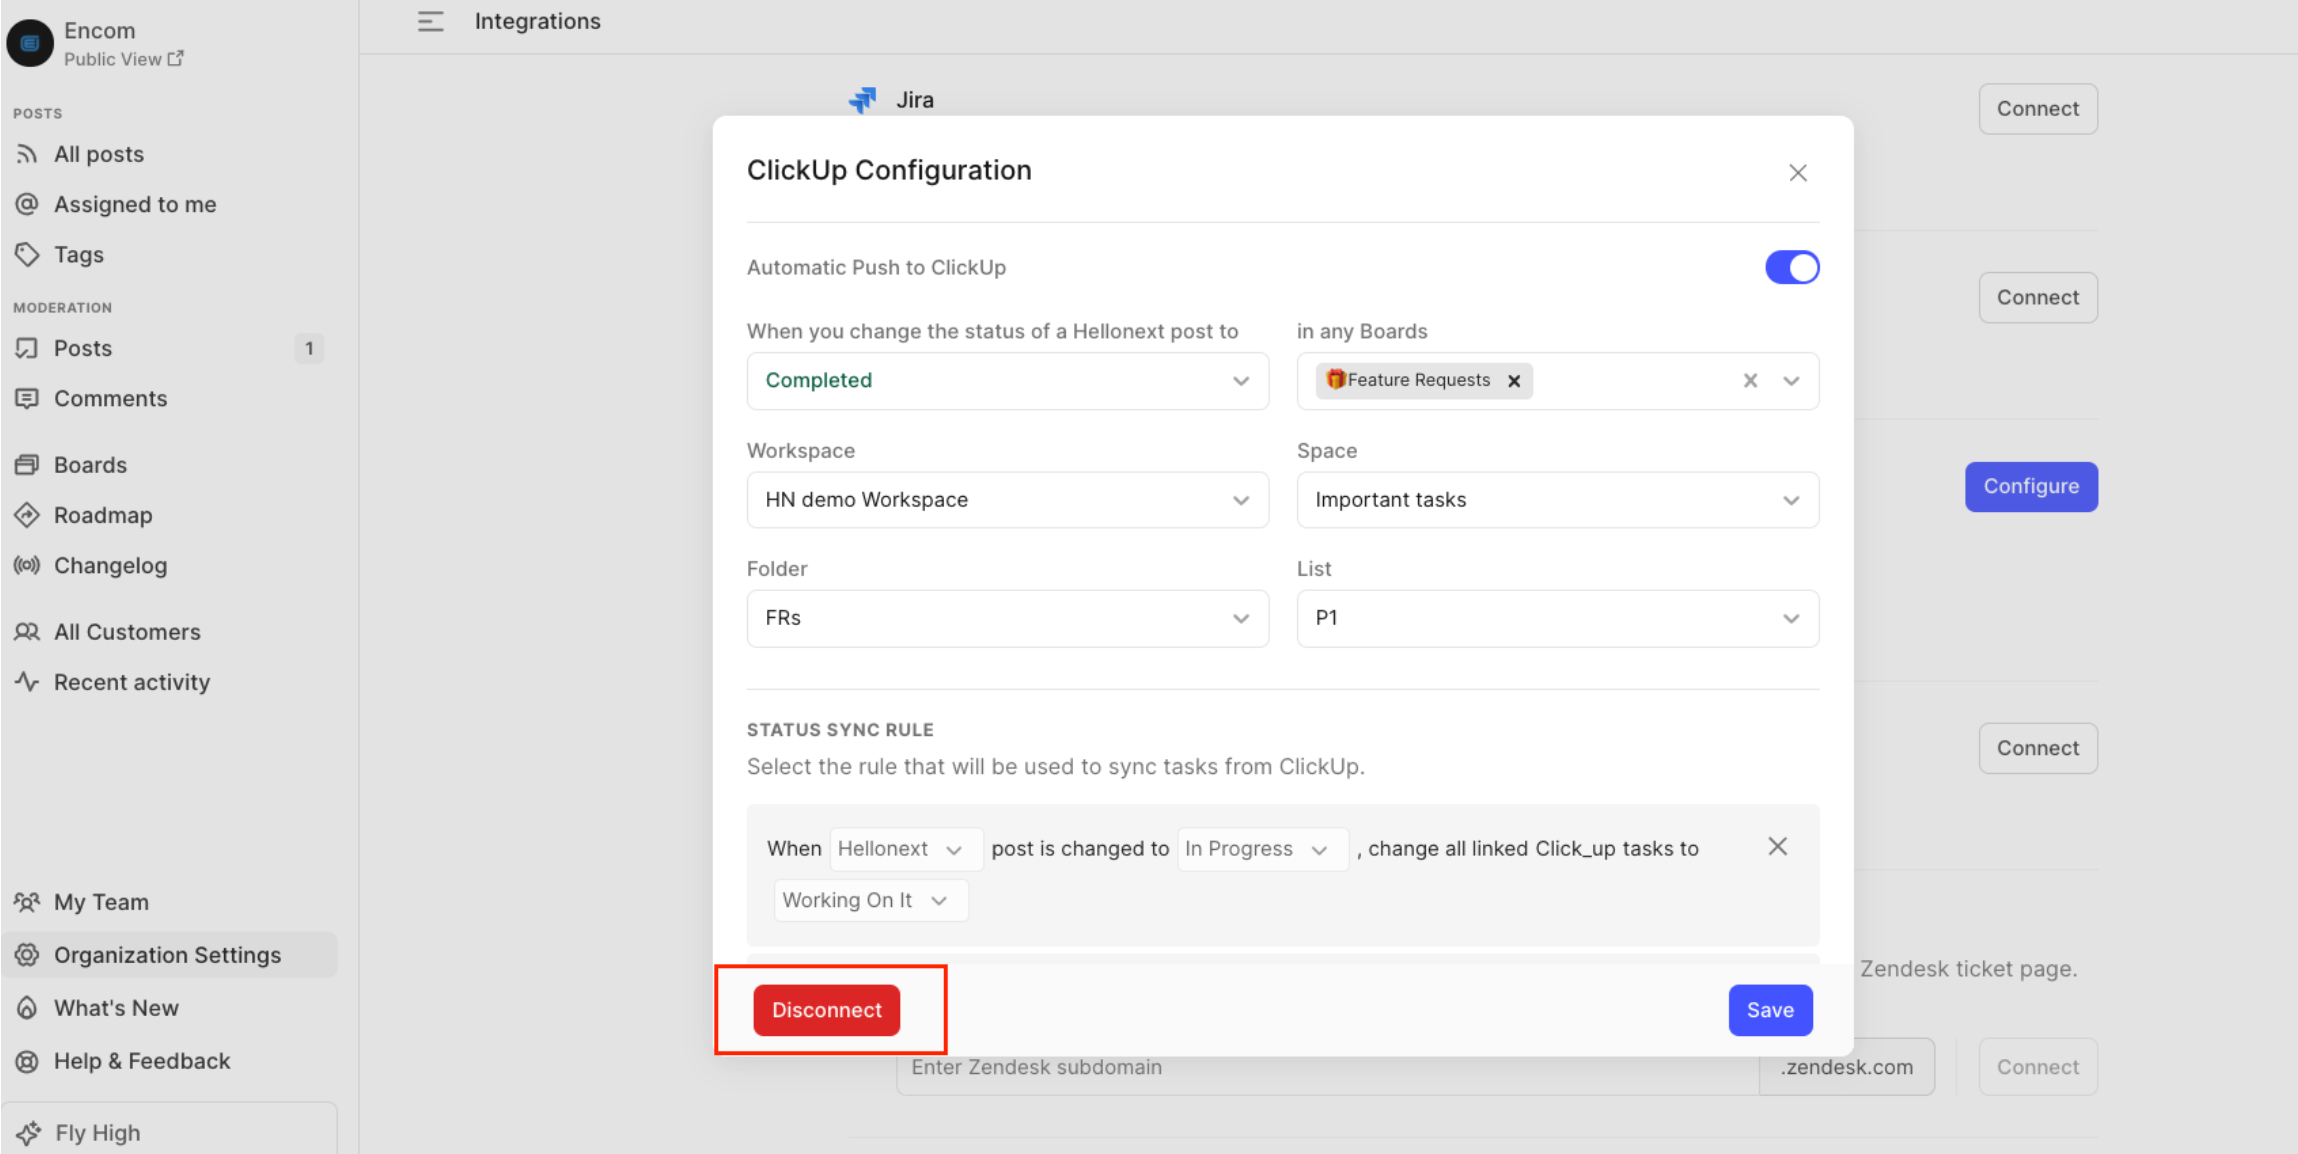
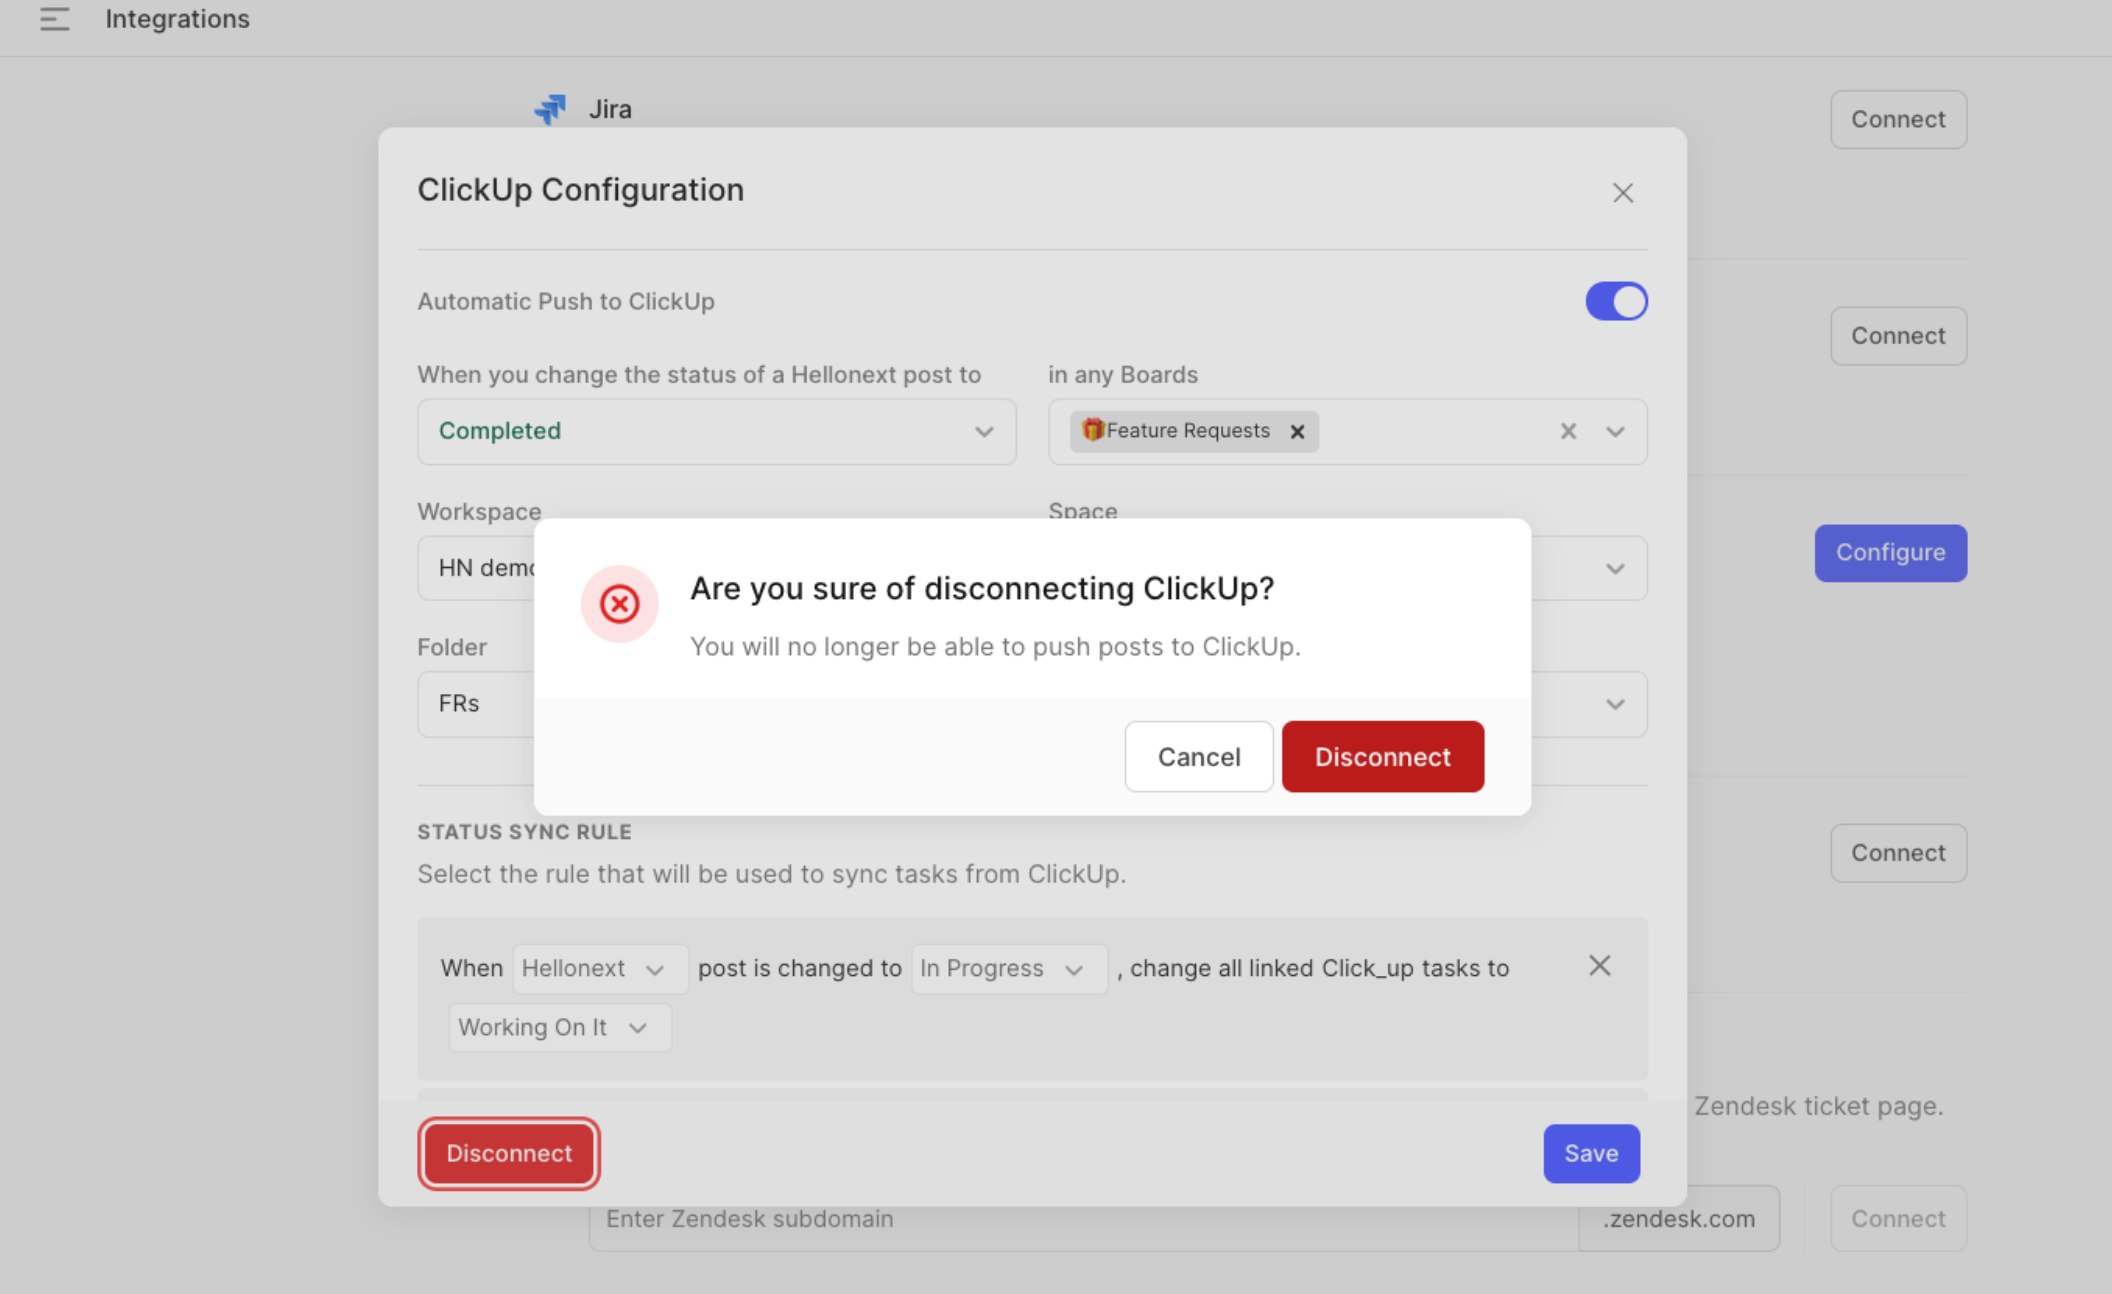
5. Disconnect Hellonext - ClickUp Integration:
To Disconnect the Hellonext - ClickUp Integration head to your Organization Settings on the left panel of your Hellonext Dashboard → Toggle to the Integrations tab → Click on Configure for ClickUp → Click on Disconnect at the bottom left corner of the popup modal.
Here’s a screen recording that will take you through these steps:
Seems rather easy and simple to follow doesn’t it? That’s because it is!
Do feel free to reach out to us if any queries should arise! 😃🙌🏼